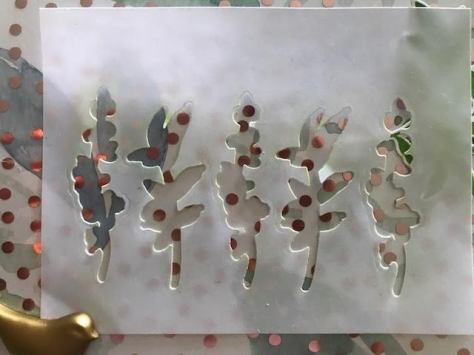
This lesson focused on the technique known as ‘masking’. A stamped image is covered with a cut out of of the stamped image. I used the sticky edge of a Post It Note. I have also used masking paper for images that are very intricate and needed the entire image covered. For this card the most important part that needed to be masked was the top of the vase and the Post It note paper worked well for this card layout.
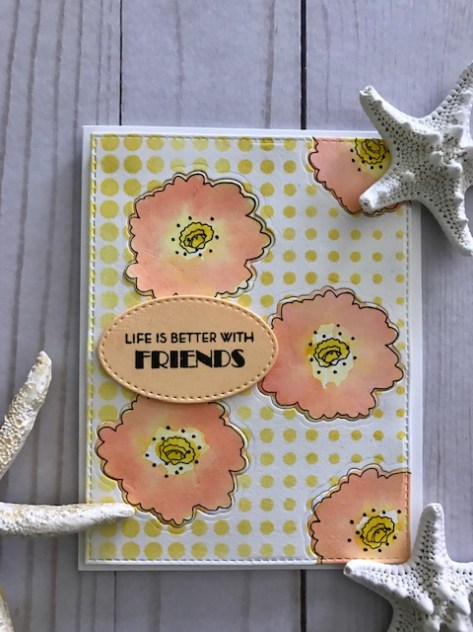
I used Altenew stamps from the Garden Silhouette set and coordinating dies. My paper choices were white card stock for the card base, yellow pin dot paper for the card front and Cason watercolor paper for the tag. The twine bow is from a May Arts spool. The hugs stamp used Versamark black ink. The vase was stamped using Stormy Sky blue distress ink. The flower was inked with two shades of Altenew yellow ink cubes set and stem was colored with a green Tombow marker.
First step, was to ink and stamp the vase on a piece of watercolor paper. I stamped it again on a Post It note, die cut the vase and covered the stamped vase. I colored the stem and flower, stamped it using my MISTI stamping platform. I had to ink and repeat the stamping to get a darker image. Next I die cut largest tag from Sizzix set that included seven different tag sizes. The die cut image on the watercolor paper creates an embossed edge which adds visual interest to the card. I stamped the hugs on the yellow dot paper, die cut it to fit the card front and was ready to assemble the card. I tied a twine bow to the top of the tag.
The last step after adding the dot paper was to attach the tag using double sided foam tape. A clean and simple masked card.
Supplies
Altenew Garden Silhouette stamp and coordinating die set
On to this lesson which focused on the use of heat embossing when creating a stamped card. I used heat embossing when I stamped the double flower image. I used the small double flower from the Forever and Always poppy set. I stamped the double flower image over a quarter sheet of mixed media paper using Versamark ink and then heat embossed using Ranger silver embossing powder.
I painted the flowers using shades of Altenew ink cubes in light purple and pinks. When that was complete I used a scalloped curve My Favorite Things die for the bottom of the piece. I added a piece of pink patterned paper to create the card front. I then I die cut the card front using a stitched rectangle die from My Favorite Things. I stamped the sentiment from another Altenew stamp set in Versafine black ink. I added a few glittery pink Nuvo dots for accents.
Nancy Souza Heat Embossin
Supplies
Altenew Always and Forever stamp set- smll double bud stamp
Altenew stamp sentiment Hello Starshine
Altenew ink cubes- purple and pink
Ranger silver embossing powder
Heat tool
My Favorite Things die- curved scallop edge, stitched rectangle dies
“Color Your Day” lesson focused on including color to a card. I enjoy creating cards and other paper related projects that include that pop of color including even the smallest detail. The topic of this lesson was focused on using colors so I reached for my Copic alcohol markers.
I selected the Altenew Forevery Always stamp set and used the double poppy stems. My paper selection was Neenah white card stock which works well with Copic markers. I stamped the stems twice using black Memento ink and my MISTI stamping platform. I varied the placment of the stems and was ready to color the stamped stems. Starting with the lightest shade of orange for the buds and stems I colored in the images. Then I blended and shaded moving to the mid range and darker colors to create depth in the images.
When I finished I used the gradient dot Altenew stencil and Altenew sunkissed ink cube and a blending brush to apply the ink. I stamped an Altenew sentiment- Thinking of You- on white card stock, die cut the piece and inked the paper with the same ink I used on the stencil.
I created a window frame using two different sizes of the stitched rectangle dies I had. It was an A2 size to cover the front of the card. I used liquid white glue to position the window frame onto the colored piece. I assembled the card. The word tag I popped it up using foam tape. The last step that pulled it all together by adding dots to the open blooms using a black glaze pen.
What did I learn? Shading and blending add depth to the stamped poppy buds and focusing on a simple color palette.
Level 2 Beautiful Details Lesson took a bit of thinking and reviewing my collection of Altenew materials. And watching the lesson videos again. The Antique Rose stamp set has a matching stencil and masking option and the shape for the stencil is simple and easy to outline. I used a piece of heavy weight white card stock and inked the rose stencil using Altenew soft lilac ink cube. I moved the stencil around the paper to cover as much as I could cover rotating the stencil as I inked. The ink color has a light gray shade to the purple inking. Then I used a fine tip black marker pen from Faber Castell to outline each inked flower.
I die cut matching light blue card stock for the background and the inked paper using several My Favorite Things stitched layered rectangle dies. I added the black and white wide dotted Altenew washi tape to a strip of white paper and die cut that as well. A stamped sentiment from Altenew “Just Because”, a black banner complete the trio of die cut banners. I layered the pieces onto a A2 white card base. When everything was in place, I added three raised black dots using glossy Nuvo drops. That brought the three colors together- soft lilac ink, black and white. The rose stamp from the set is a multi layered one and how I used it here looks very different than the stenciled on its own. I included a card that I created for the lessons that I used the layered rose stamp on another card.
Supplies
Altenew stencil small Antique Rose
Altenew soft lilac ink cube
Altenew black and white dot washi tape
Altenew stamped sentiment
Versamark black ink
Stampin’ Up light blue paper
My Favorite Things stitched rectangle die and banner dies
On to the next class in Level 2 and the title is Polychromatic. I watched the videos, took notes and watched the videos again. I finally decided that the mono color layout was the technique that was the one that I found one that I had limited experience with. I selected a large daisy like stamp from the Smile More stamp set. I thought yellow would be a good happy color to use for the card layout. The card stock is a light yellow from Stampin’ Up I had in my paper collection. I cut the sheet in half so I had more space to stamp the flower and then select the part of the paper I liked the best.
Stamping was done using Versaclair Cheerful Yellow ink which versatile ink. It is stays wet enough to emboss with and can be used as a dry ink. I dusted the paper with my embossing buddy anti-static poweder first. I used my MISTI stamping platform, secured the stamp to the cover, inked the stamp. I added clear embossing powder to the image, heat set it and then rotated the paper to stamp the next flower and emboss.
When I was finished I used my awesome set of Prismacolor pencils and the different shades of yellow that I had in my set. I started with the lightest shade of yellow to color in the petals. Then I used a slightly darker shades of yellow to begin the shading and coloring of the petals. I added a darker yellow for the center of the flower. That worked the best without being too dark.
Once I was finished coloring I selected the part of the paper that came out the best as I need to die cut a piece for the card front. The card layout was a horizontal one with a left fold. I used a stitched edge die from My Favorite Things for the yellow paper and for the piece of striped vellum. I die cut the Altenew hello from a light yellow card stock. I have a embossing and die from Stampin’ Up that creates paper buttons. I tiny hole punch allowed me to thread the jute string to tie a bow. Some carefully placed white glue for the hello die and then behind the die to glue the vellum to the card front. I few tiny pieces of foam tape for the paper button. Another class done!
Next lesson is lesson four and the challenge is Creative Watercolor Media. After watching the videos for the lesson and reviewing the Altenew stamps that I had and I was ready to start planning. I selected several liquid/ re-inks- twisted citron and tumbled glass , to paint with and a half sheet of Canson watercolor paper. The stamp set is Leaf Canopy outline. The set also has solid stamps and I have the matching dies. I used Versamark ink and an embossing buddy anti-static powder before stamping the outline leaf branches. Next, I applied gold embossing powder and heat set the branches. I rotated the paper to stamp another part of the paper and heat emboss the branches again.
I used a small bubble paint palette to drop in the liquid re-inkers and added some water to the inks. Next, I used a large flat paint brush to apply water on the paper. The first was very light as that was okay for the background. Next, I added more inked color to the leaves and some of the ink puddled to create some contrast and shading. I used a heat tool to dry and move some of the ink around. I used a fan brush to splatter the diluted tumbled blue glass to the background. Next I used a curved scallop edge die from My Favorite Things to cut the bottom of the piece and then trimmed it to the quarter sheet for a horizontal card front.
Almost finished- I cut a small piece of white cardstock and covered it with the gold stripe wide washi tape. I attached it to the bottom of the card front and then adhered the painted piece to the rest of the card. I stamped hugs on a left over piece and die cut it using s small rectangle size I added some gold thread behind the tag and a piece owf foam tape to adhere it to the bottom of the card.
What I learned? I enjoy watercoloring and have used many different mediums to paint. This was the firs time I used liquid re-inkers to paint with. I was able to add depth/shading to the leaves just by adding more ‘paint’ to the leaves. A new option to paint with and I have a small collection of re-inkers. That’s a good thing.
Nancy Souza Level 2 Watercolor Media
Supplies
Altenew Leaf Canopy – outline stamp
Altenew wide gold stripe washi tape
Ranger distress liquid re-inkers- Twisted Citron and Tumbled Glass
Gold embossing powder
Versamark embossing ink
Embossing powder buddy
Versamark blsck ink
My Favorite Things scallop curved die and stitched rectangle
Wide flat paint brush, round paint brush and fan brush for spalattering
On to the next Level 2 lesson and this technique is titled With a Twist. The lesson videos shared many ideas to create unique backgrounds. I wanted to try something new which was the inlaid technique of stamping and then die cutting the pieces, adding color and returning them to the background paper. I selected the Altenew Ethereal Beauty stamp set and coordinating dies. These flowers have a great outline stamp and would be easy to color/paint. I used watercolor paper for the stamping using Archival black ink as I would be painting the flowers. Then I die cut the stamped flowers. Painted them with Zig markers in shades of yellow and light orange. When dry I added black dots using my favorite pen- black Glaze pen. I stenciled the background using the Altenew gradient dot stencil with a light organge ink cube from Altenew a foam blender to created the inked background.
Next I put the die cut flowers back in the original space and taped them in place on the back side of the paper. I die cut the piece using a stitched edge rectangle from My Favorite Things. To keep with the organge color theme, I stamped the sentiment on to light orange paper and stitched die cut oval from My Favorite Things. I assembled the card using foam tape and then added a few pieces for the back of the tag.
Nancy Souza Level 2 With A Twist
Supplies-
Altenew Ehtereal Beauty stamps and die set
Altenew stamped sentiment
Altenew orange/yellow ink cubes
Altenew gradient dot stencil
Archival black ink
Zig watercolor markers and water barrel brush
Black glaze pen
My Favorite Things stitched oval die and stitched rectangle die
On to the next lesson and the focus for this lesson “In The Mood For Color” is using color to express a mood. I created a card to express happy thoughts. I used a stamp set from Altenew Garden Silhouette. The bright colors would create the mood and I used Tombow markers in bright pink, yellow and light blue for coloring the flowers and bright green for the stems. The leafy branch was inked with Altenew light green ink cube.
I used a simple clean layout that started with a quarter sheet of white card stock. I colored the first stamp using the bright yellow marker and green for the stem. I stamped the yellow flower in each corner. Next was the pink flower in the middle of each side and filled in the other spaces with another flower and this one was light blue. I filled in the other spaces with the stamped mini-leaf branch.
Next, I stamped Happy Thoughts sentiment in black Versaclair ink and clear embossing powder. The next step was to add light green ink using a foam blending pad and the small dot stencil. The last step was to die cut the piece using a stitched edge die cut from My Favorite Things. I used double sided tape to attach finished piece to white card stock. Great easy card to customize for other occasions.
Supplies
Altenew Garden Silhouette stamp, leaf, branches and matching sentiments
Altenew Happy Thoughts sentiment
Altenew gradient dots stencil
Tombow markers- Yellosw 062, Pink 743, Blue 451, Green 133
It was time to work on another lesson 2 menu and I started this time at the beginning of the list. After watching the lesson video and taking a look at the card inspiration I was ready to begin. I used a new stamp set from Altenew called Garden Sillouette. I ordered this set as liked the selection of solid flowers, leaves, branches and the canning jar and vase stamps.
As the lesson focus was using a stencil I had to create one first. I used a piece of stencil paper from a pad that was from Melissa and Doug. That was a great find one day. I used two different leaf dies from the set to die cut five branches. Next I used white card stock and my MISTI tool to ink the flowers using Tombow marker 553 and 192 for the stem. I had to add more ink from the markers to get a darker image and for the final stamp I spritzed the flowers with water to blend the ink a bit. I then die cut the coordinating from white paper for the three flowers. I lightly sprayed each die cut using Pixie spray and covered each flower. I layered the stencil on top , used paper tape to secure it and used a foam bleding pad and Altenew firefly green dye ink to add color to the branches. Now the flowers are in the foreground and the branches are in the background.
I added a strip of black and white stripe paper from paper pad fromMy I avorite Things. I used the Thanks stamp from the set for the sentiment and banner die and a coordinating blue banner die cut as well. I used my favorite stitched edge rectangle die from My Favorite Things and then attached it to horizontal A2 card base. I splattered the piece with water diluted light blue ink using the Tombow marker I used on the flowers. Simple card layout using only a few colors.
I created the stencil using dies from the Garden Silouette set using stencil paper from Melissa and Doug
Supplies-
Altentew Garden Silouette stamps and coordinating dies
Altenew dye ink Firefly green ink cube
Tombow markers 553 and 192
Ranger foam blending tool
My Favorite Things mini banner dies, stitched rectangle die
My Favorite Things black and white stripe paper pad
Hooray! I received my Level 1 badge for successfully completing the Level Challenge! Now it is on to the Level 2 lesson homework. This lesson objective was to use markers to create a card with visual interest. I have a sizable collection of Copic markers and of course I had Yupo paper. I combined the two to create the background. I like using Alcohol Ink (AI) and have done lots of projects using this ink on Yupo paper both the white and transparent paper and many different techniques including using canned air to move the ink on the plastic paper. The homework for Lesson 1 is to use markers, so I used my Copic markers. I created stripes of shades of green on Yupo white paper using five different Copic greens. I added more ink to each stripe to darken them. Then I used a spray bottle that is filled with 91% Alcohol and lightly misted the paper. I only wanted to created some visual interest and keep the stripes intact. Next, I taped the hello die to the inked paper and die cut it. This created a matching colored hello. To cover up the die cut ‘hole’ I die cut a piece of white cardstock using a stitched rectangle from My Favorite Things. I also die cut the Yupo paper using another stitched rectangle to fit the front of the A2 card. Almost done- I used some white glue to adhere the hello die cut to the white rectangle. I stamped a sentiment from an Altenew set I had in my collection -You Make Me Happy that coordinated with the Hello sentiment. I die cut it using a mini banner die from My Favorite Things. I used 3M foam tape to attach the completed rectangle, I added a small piece behind the end of the word banner and tucked the end behind the panel. Done! I love the shades of green. This would look great in any color and is generic depending on the colors that you use. Happy Mail!