TEN CHRISTMAS/HOLIDAY CARDS USING ONE 12″ X12″ PIECE OF SCRAPBOOK PAPER

PLANNING AND CREATING TEN CHRISTMAS/HOLIDAY CARDS

Five Christmas Cards

Planning ahead to create handmade Christmas and or Holiday cards can be an easy, creative and stress free.

Step One-select a 12″ x 12″ piece of double sided that has an over all pattern that is Christmas themed or Holiday themed.

Step Two– you will need a paper trimmer, a scissor, ruler, double sided tape, liquid glue, foam tape, five sheets of 8 1/2″ x 11″ white cardstock, ten envelopes, off white cardstock for the sentiment tags, black ink, a pencil, a variety of Christmas/Holiday sentiment stamps, Nuvo accent bottles, clear glitter pens, red cardstock, red glitter and Xyron sticker maker mini machine with single sided sticky cartridge.

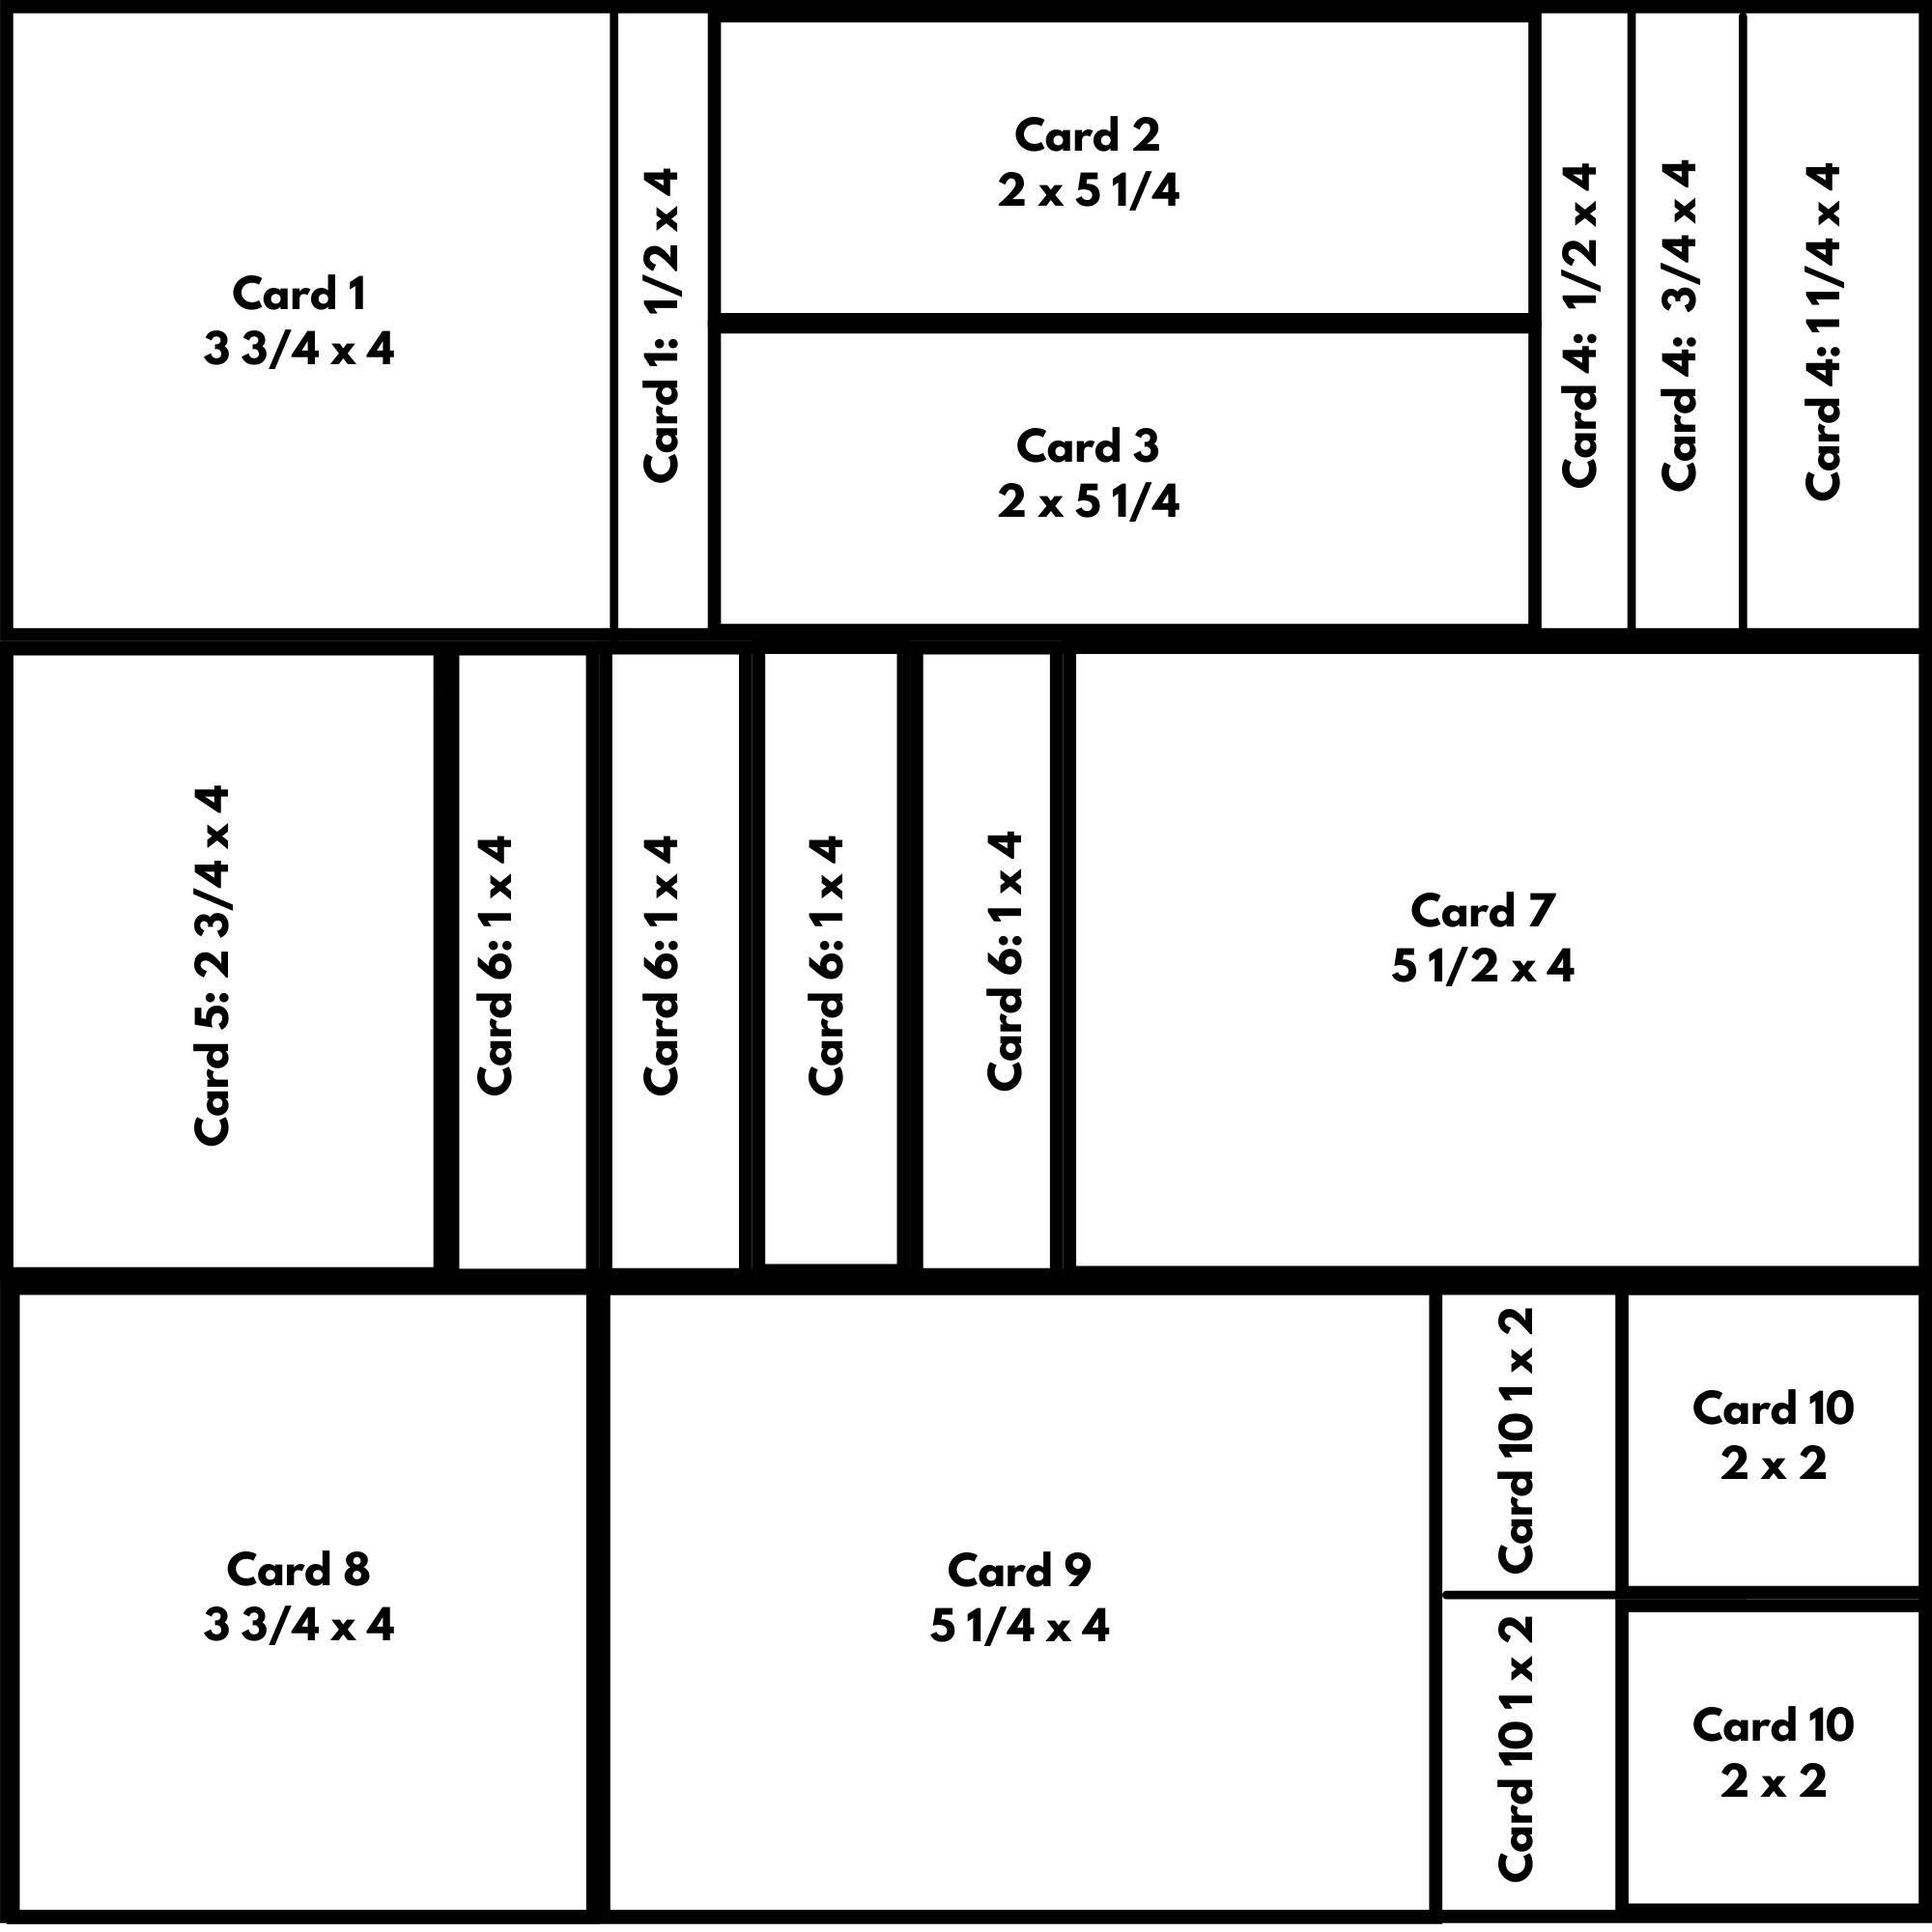
Step Three- use the Card Template/Map to measure out the dimensions for the 12″ x 12″ scrapbook paper. Number each envelope 1-10. As you cut pieces for each card, put the pieces in the matching numbered envelope. Cut the white card stock in half and score at 4 1/2″ and fold in half.

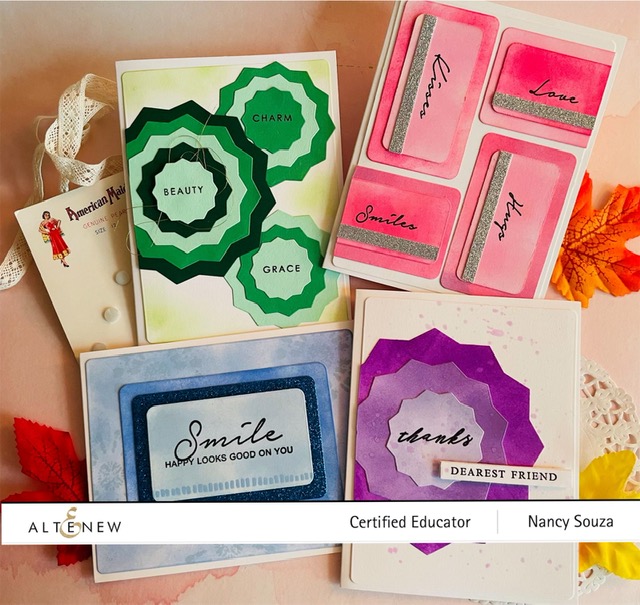
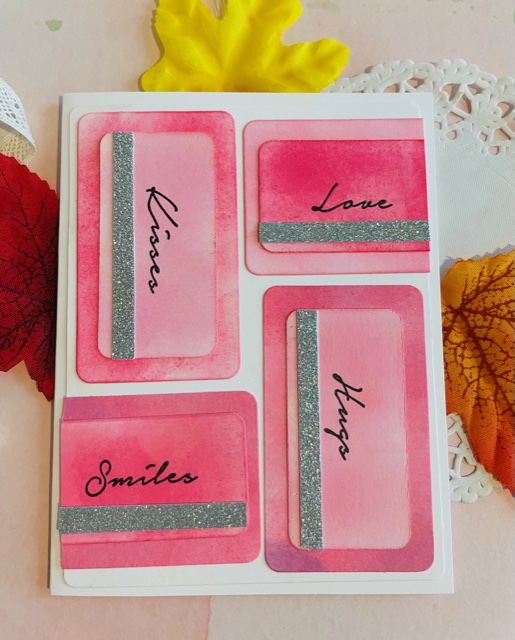
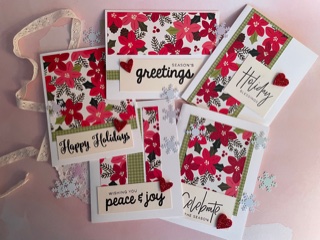
Step Four– remove the cut pieces from one envelope, the A2 white card and arrange the pieces using both sides of the pattern to create the card front layout. Add the stamped sentiment to the completed card front

Step Five– When all the card layouts are in place and the sentiments have been added it’s time to create the glittery hearts. Die cut ten small hearts from red paper, place on the sticky side of the Xyron tape, Remove the die cut heart and sprnkle with red glitter over a piece of scrap paper. Add the glittery heart to the card for an accent. Add accents by outlining some of the pattenrs using the glitter pen. Add glittery Nuvo drops for accents. Add sentiments and greetings to the inside of the card. Hooray! Ten cards done!

ALTENEW OCTOBER 4, 2021 “ALPHABET NAME GAME” BLOG HOP

Hello and welcome to the Altenew October, 2021 Blog Hop themeed “Alphabet Name Game”. My first name begins with the letter N and my cards use Nesting Dies sets from Altenew. I created four different cards, two used the Soda Top nesting die set and two used the Rounded Rectangle die set. I enjoy a crafting challenge and this one required some creative thinking that began with the letter N and Nesting Dies was the perfect option.

Please join my AECP colleagues and check their wonderful and creative creations. You will be inspired like I was! Thanks!

Sandra Woodsen https://sandespoema.com/educator-blog-hop/ before me in the Hop List and Nandini Karmarkar  http://nanspaintpaperscissors.blogspot.com/2021/10/altenew-educators-alphabet-name-game.html

is after me on the Hop List. Please stop by and check out the other AECP posts as well.

Here are are the four Nesting Dies cards I created for the October Blog Hop. Hope you are inspired to use Nesting Dies sets for your next card making project.

Altenew Nesting Dies Soda Top and Rounded Corner Rectangle Cards

Soda Top Nesting Die Set Thanks Dearest Friend Card

Alrenew Soda Top Nesting Dies

This nesting die set is called Soda Top and is a unique shape. First I inked white card stock using Altenew Shades of Purple ink cubes. I inked white card stock paper in a dark ink shade of purple. I die cut the paper using the largest die from the set. Then I inked two more shapes using lighter shades from the purple ink cube set. I stamped and clear embossed the Thanks and Dearest Friend words. I used a large rounded rectangle corner die from My Favorite Things for the white background paper and added some purple splatters to the white background. I adhered the stacked set off set to the left and added the word tag using foam tape. Love the simple layered look.

Soda Top Nesting Dies Cut Altenew Gradient Cardstock

Altenew Gradient Green Paper and Soda Top Nesting Dies

For this card I used card stock from the Altenew Gradient Card stock Green Meadows, package. I die cut a variety of sizes and colors from the paper package mixing and matching the layered sets. The largest set has five colored papers and two that have three. I stamped a single word in each center piece. I added some gold thread behind the largest center piece die. The white background piece was die cut from the rounded rectangle die from My Favorite Things and added some light green ink to the rounded corners for a finished look.

Altenew Nesting Rounded Rectangle Glitter Paper

Altenew Nesting Die Rounded Rectangle Corners

For this card I mostly used Altenew Glacier Caves blue gradient ink cubes to ink all of the white card stock for the rounded rectangle nesting set. I added some glitter paper from the Altenew Ocean Reflection Glitter CardstockStar Light Glitter paper. I added some stamping to the top sentiment rectangle and the background paper from the Altenew Tie Dye Motifs layering stamp set. The word stamps were from the Altenew Smiles and Hugs stamp set. The pop of glitter paper really makes the card shine.

Altenew Nesting Rounded Rectangle Word Tags

Altenew Nesting Rounded Rectangle Dies Word Tags

Another card using the Altenew Roumded Rectangle Nesting die set. Each layered tag was inked using Altenew pink ink cubes from the set creating gradient colored paper. I stamped a single word in the piece that was on top. I added silver glitter Altenew Washi tape strip that was trimmed for each of the tags. I alternated the position of the four layered tags to create the card front. Love that of glittery Washi tape.

  • Altenew Nesting Die sets- Rounded Rectangles and Soda Top nesting dies
  • Altenew silver washi tape
  • Altenew ink cubes- purples, pinks and blues
  • Altenew Ocean Reflection Glitter paper
  • Altenew Gradient Green Meadow card stock package
  • Altenew Smiles and Hugs stamp set
  • White card stock for all of the card bases and inked pieces
  • Sizzix die cutting machine
  • 3M Tape Runner, liquid glue and foam tape