
Hello! and welcome 2021 and a new year for more paper crafting adventures. On my journey and enrollment in the Altenew Educators Academy Program, this is my new blog post for Level 3. I selected this course Cards In Motion to learn new tecnhiques and ideas. Here are my cards that incorporate the lesson techniques and of course putting my own spin on the cards. Of course. Maybe you will be inspired by my cards as I was after watching the lesson videos for cards in motion.
LESSONS AND TECHNIQUES SHARED IN THIS CLASS-
- Shaker cards-two different techniques
- String spinner- two different techniques
- Pop up- two different kinds
- Spinner wheel wreath
- Reveal window
- Twist pop up- two different lay outs
- Combination interactive card
FUN FACTS THAT I LEARNED
This lesson covered so many new techniques and ideas to create cards that all included an element of motion and movement. I had at some point created some of these type cards as I have been a card maker for a long time and still enjoy learning new ideas. In this class I had the opportunity to fine tune some techniques, try new layouts, stretch my card making skills and an opportunity to create my own combination interactive card for the last lesson. I used the Altenew supplies that I had-stamps, stencils, dies and inks. I don’t have an extensive collection of Altenew products, so I had to be creative in repurposing them for the card lessons. I was pleased with the cards I created and have now added new techniques to my card making ‘toolbox’.
HERE ARE THE CARDS I CREATED FOR THE CARDS IN MOTION CLASS


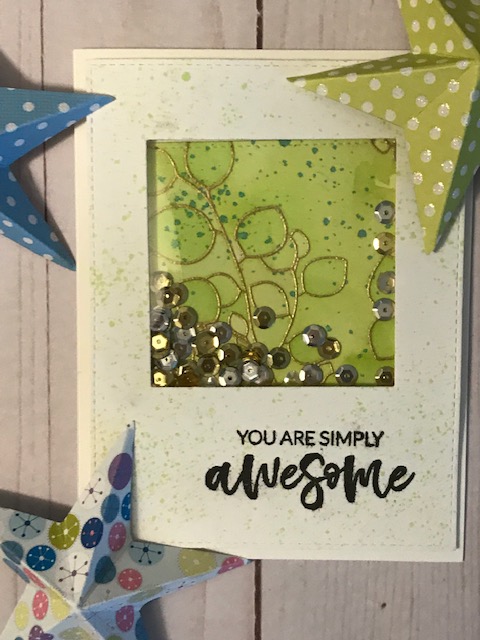
LESSON 1- TWO DIFFERENT SHAKER CARDS

This lesson demonstrated how to create a shaker card by creating a die cut opening in a separate piece of card stock. I adhered the acetate film to the opening of the card stock. The leaf canopy stem was stamped and embossed using gold embossing powder and a water colored painted background. The sentiment was stamped in the right corner, spattered with green ink and stitched edge rectangle die cut edge. Gold and silver sequins were used for the shaker material. I used foam tape to add dimension and to adhere the piece to the finished A2 card.


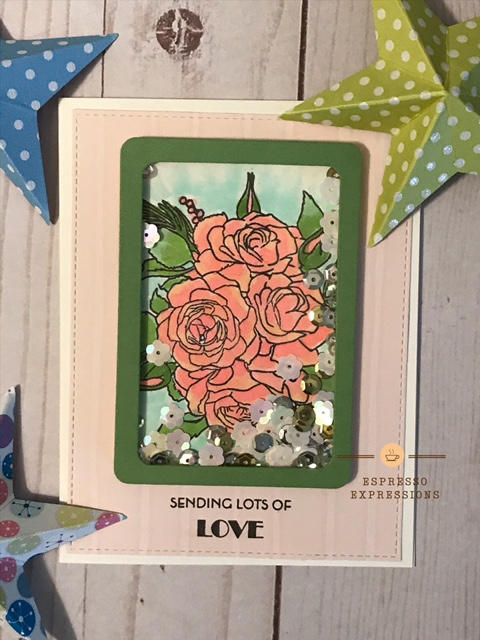
ANOTHER SHAKER CARD

Shaker card
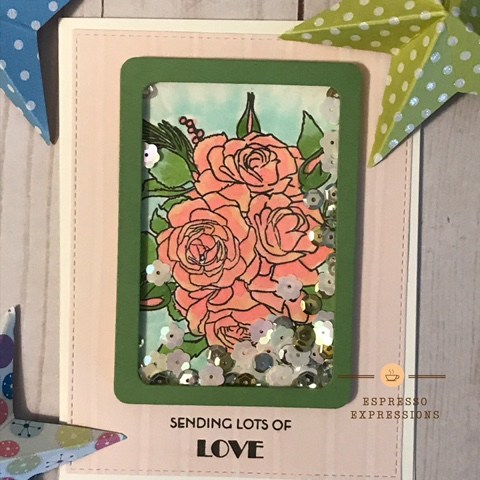
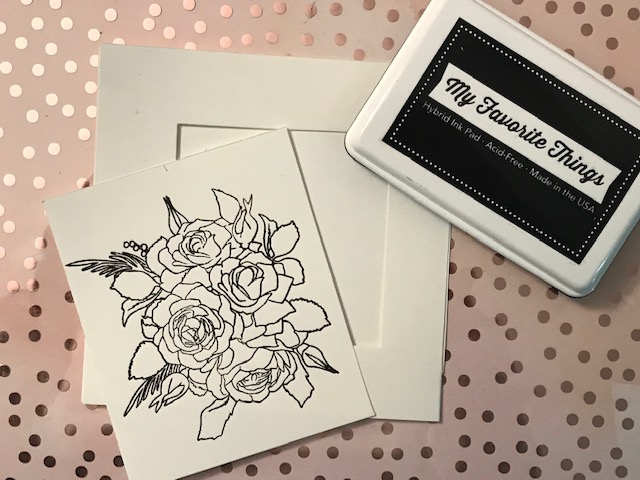
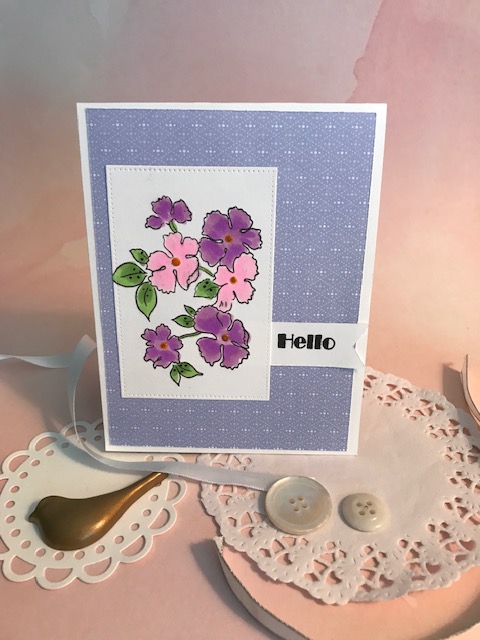
This shaker card lesson demonstrates the technique of creating a shaker pocket on the front of the card. It is a separate piece that I created by stamping the roses, coloring them ,using the rounded corner rectangle Altenew die to create a frame. I added the acetate to the back of the frame, added layered foam tape around the frame. Then I added the sequins and added the stamped and colored rose piece to create the shaker part and then attached it the card front I had prepared- stamped and die cut. A different way to create a shaker card that I have tried before. A new technique for me, that was great.


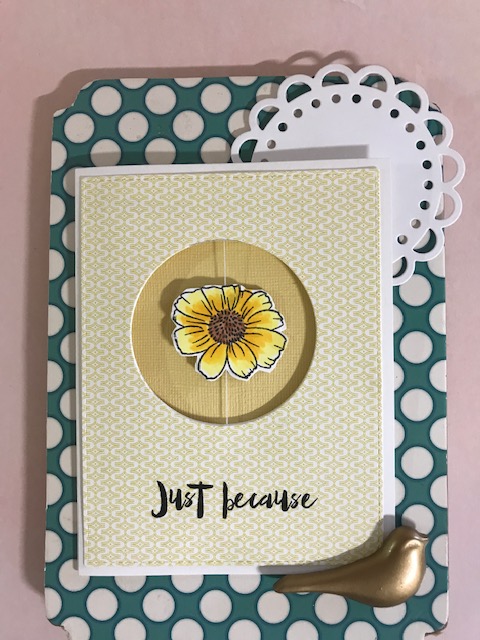
NEXT LESSON- SPINNER CARDS
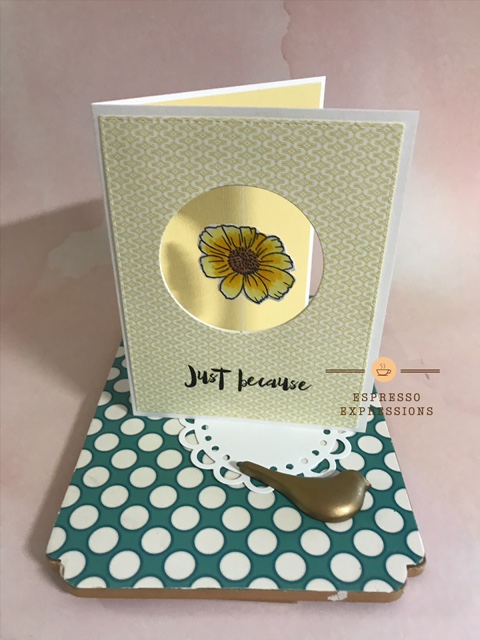
This lesson was to learn how to make two different types of spinner cards. New technique was to learn how to create a mirror image of the stamp I selected for the spinner section. Watching the video demonstrating the technique of stamping and placing the paper on top to create the reversed image was a great technique and super easy. I fussy cut both images- positive and negative, colored with Copic markers and then attached the flowerthread spinner. A circle die cut in the center of the printed paper and the card front hid the taped thread at the top and bottom of the circle. I added a a piece of solid yellow card stock to the inside of the card and stamped a sentiment to the bottom of the front of the card.


ANOTHER SPINNER CARD TECHNIQUE
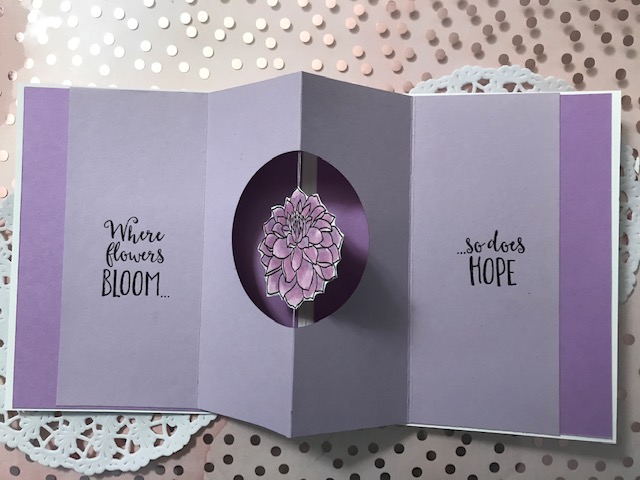
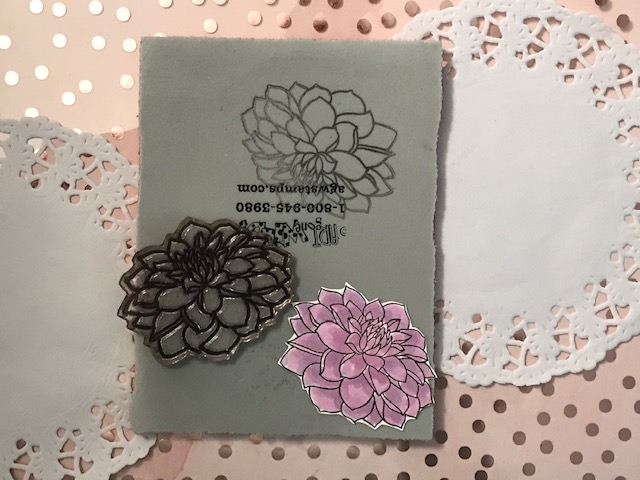
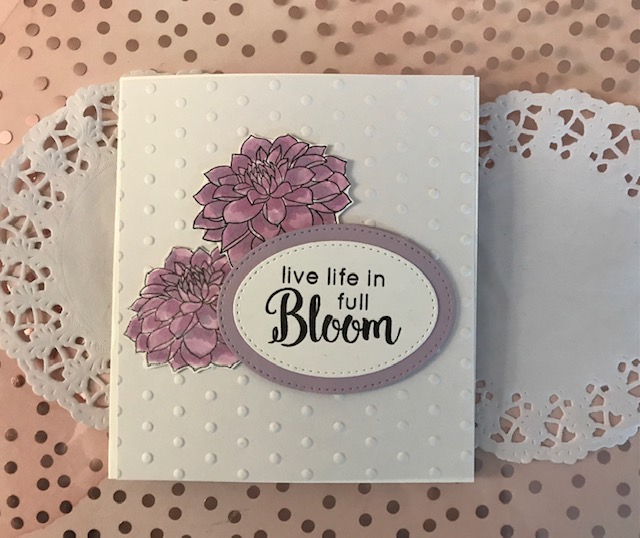
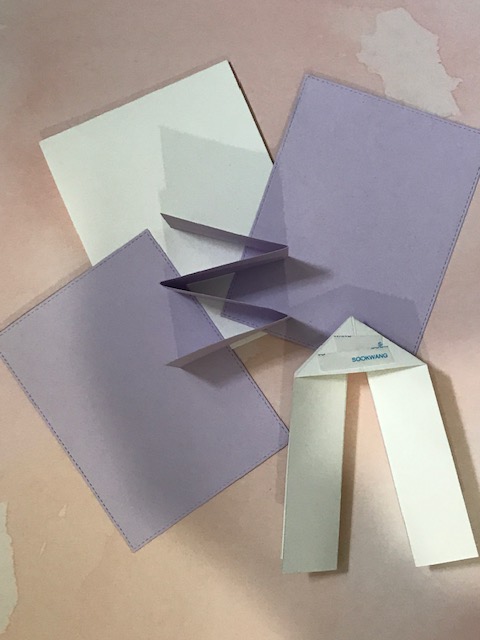
This is the second spinner technique taught in this lesson. I created a reverse pop up fold for the inside of the card. I die cut a circle for the middle of the purple card stock. I used the same reverse stamping technqiue for this dahlia flower stamp. For this flower, I had to repeat using mirror stamping to create an opposite image for the spinner. I colored the flowers with Copic markers in shades of purple and this time I had a matching die. I added the thread behind the two flowers and taped the thread to the back side of the pop up fold. I had already stamped a sentiment on the violet card stock and also added a darker shade of purple card stock to the inside of the card and was visible for the die cut circle and spinner. The front of the card I used an embossed dot white paper, two colored dahlia flowers and an oval sentiment. Great easy technique, I liked that there were two different ways to make a spinner card.


NEXT LESSON- POP UP CARDS
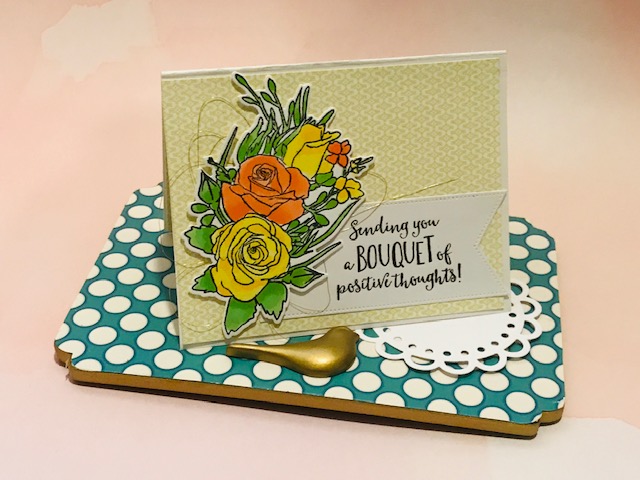
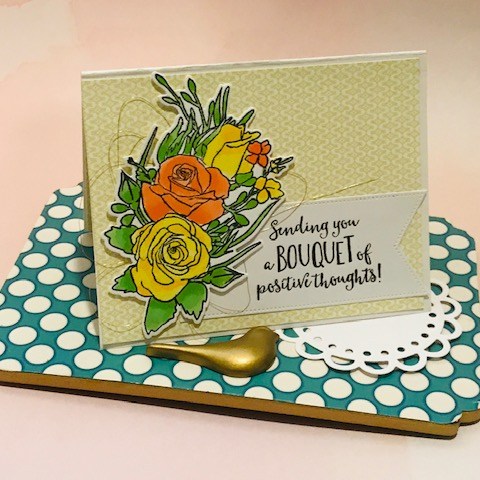
The single pop up card is one that I have made before and was good to revisit. I used the same rose bouquet stamp from the Forever and Always and coordinating dies that I used for one of the shaker cards. I stamped two bouquets and colored and shaded them using yellow and orange Copic markers. I die cut the two images- one for the front and one for the pop up inside. I added a printed paper to use on the front and inside of the card and used an X-acto knife to cut the slits to create the pop up fold. I then added the yellow printed paper to the inside and folded the piece for the pop up in the opposite direction. I stamped and die cut a sentiment for the inside and a sentiment for the front using a flag stitched die. I finished the card front adding a gold thread bundle behind the bouquet. I attached the other bouquet to the pop and added the sentiment below the pop up. I liked adding the patterned paper to the inside as it added visual interest for the flowers and not just a white card base.


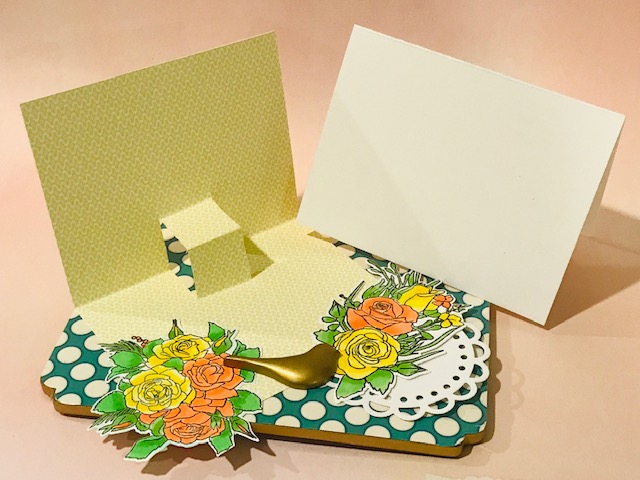


SECOND POP UP- TRIPLE POP UP
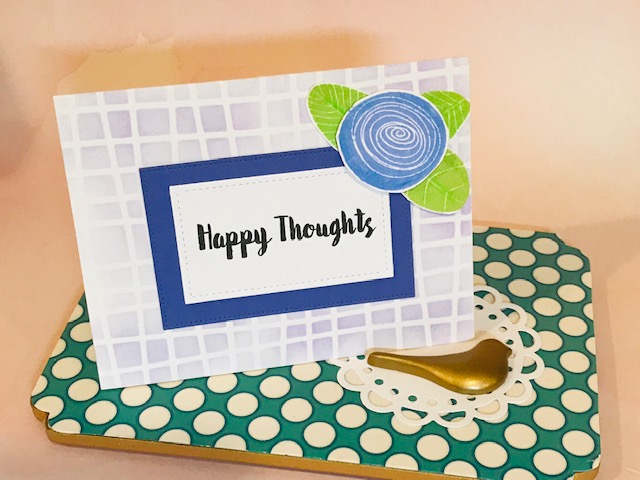
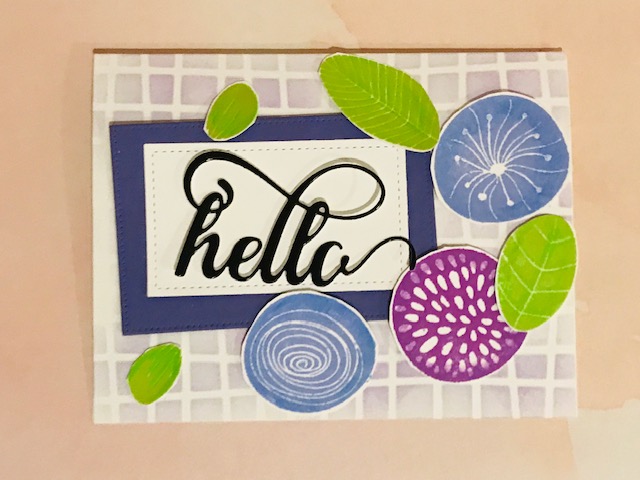
For this card, the pop up was to create a triple pop up. I searched my Altenew stamps that were small enough for the triple pop up inside the card. I found some wonky flowers I had left over from another card project. The bright flowers were the perfect match. I added shading to the flowers and leaves using colored pencils from Prismacolor set. I stenciled the front of the card using the Altenew wonky stencil and light purple ink and a foam blender. I stamped and die cut the sentiment using My Favorite Things stitched edge rectangle dies. I used another smaller piece of white card stock for the inside and I cut the three pop up slits for the wonky flowers. I stamped a sentiment to the bottom of the inside of the card. I liked the bright colors and different shades of purple on the front of the card. Happy Thoughts! perfect match for this card.


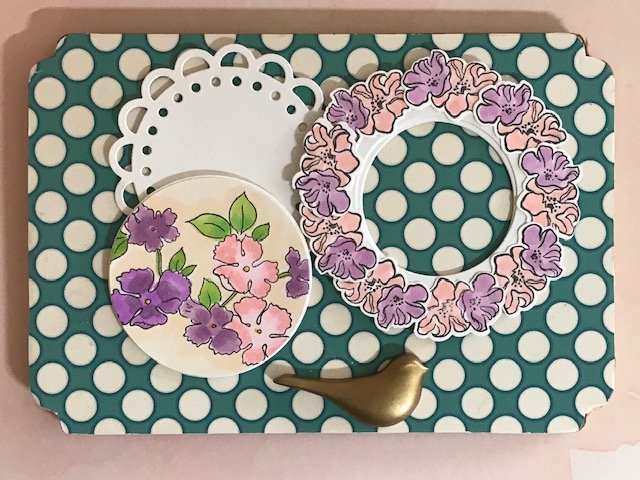
NEXT CARD- SPINNER WHEEL WREATH

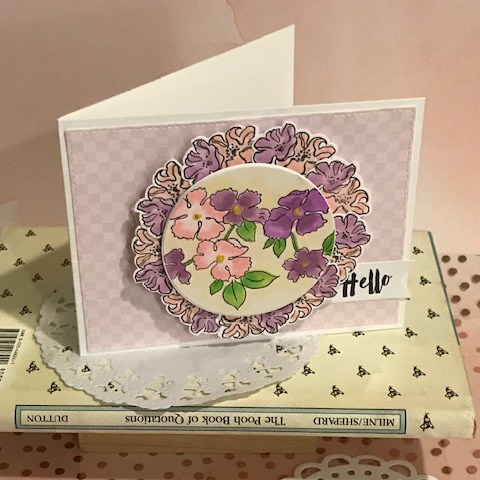
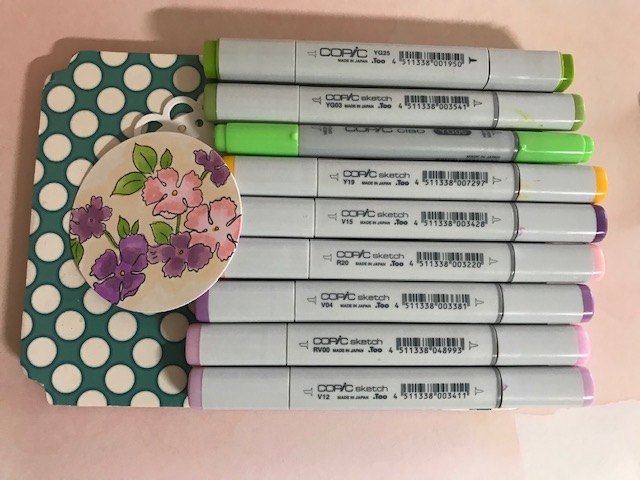
This card technique was one that was a new technique for me and was a bit challenging and one that I had to watch the video several times, stopping in the places where I needed to review the steps and techniques. When I was finished I was pleased with the card and technique I learned. Of course I added pieces and stamps that I had in my collection. I created the wreath spinner section using a small double flower from the Forever and Always stamp set. I had used it for other wreath arrangements. I added the stamped, colored and die cut double flowers to a single layer wreath die cut piece. The next step was to create the layered spinner wheel to atttach the flower wreath to. Then I stamped the flowers from the Ruffled Flowers set. I used the same color theme using the same Copic markers in shades of pink and purple and green for the leaves. A stamped a hello banner tag for the front of the card. I layered the pieces-first the layered circle base , the layered circle wreath, and then the layered stamped and colored circle for the top which would then create the center piece with the spinner wreath behind it. I added a subtle printed purple check background paper for the front of the card. When that was completed I tucked the hello word tag behind the layered piece. Hooray! A card in motion spinner card.

NEXT TECHNIQUE- A REVEAL WINDOW CARD
For this card, the technique was to create a reveal window which would have a message behind the slider pull tab. A slit was cut in the folded card front for the slider piece and pull tab. The stamped reveal piece would fit inside and slide in and out. A die cut square window for the card front of a square card fold. I used the square die cut piece for the inside sentiment of the card. The light plaid paper for the front coordinated with the stamped and Copic colored flowers. I used the rose bouquet flower set again using pinks, purples and green for the greenery/leaves. Foam tape strips were used inside for the sides and the stopper for the pull tag. The slider was cut to fit inside the foam tape edges and a pull tag was created using a small circle die to cover the partial die cut circle on the pull tab. The stamped piece was one piece, I added the contrast patterned paper to the top of the tab. Inside the window, I had already stamped the sentiment and a hello with the die cut square from the front of the printed paper.

NEXT WAS THE SHUTTER CARD

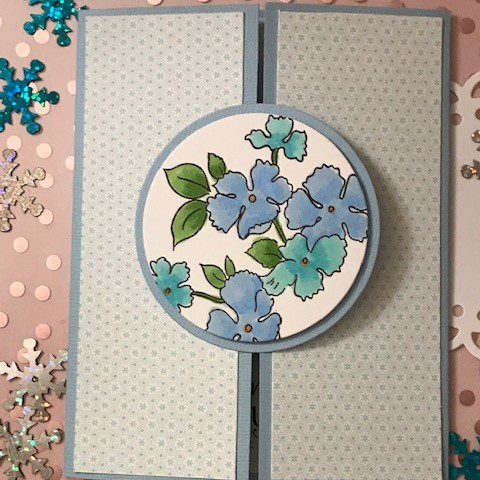
This wa another new card layout and I reached for the Ruffled Flower stamp set as I need a smaller image for the front and the inside of the shutter section of the card. I stamped the flowers several times on Neenah white card stock and colored them using shades of blue Copic markers and greens for the branches and leaves. I added subtle printed coordinating paper for the card front for the inside of the card that matched the light blue card stock for the card base. . The shutter piece was created with using two flag shaped from the blue card stock that were attached tothe tabs inside. When the front was closed the shutter piece over lapped covering the stamped piece inside. I added a stamped sentiment from a die cut rectangle for the inside of the card. I positioned the circle for the card front to cover both sides of the card front and that was enough for the card layout. I really like this card technique/layout and colors I used for coloring and printed paper.


NEXT- TWIST AND FOLD POP UP CARDS

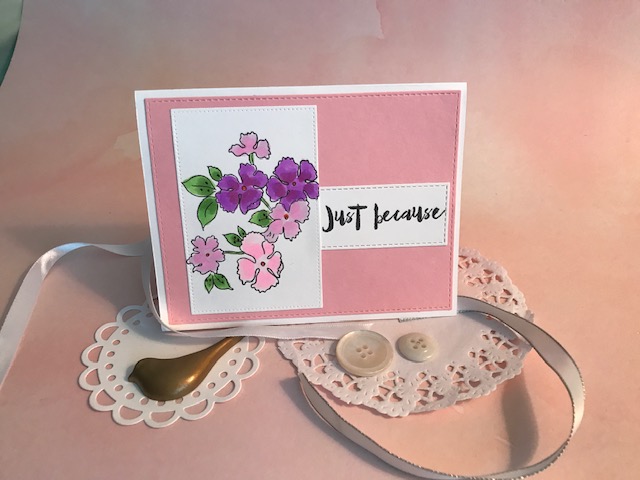
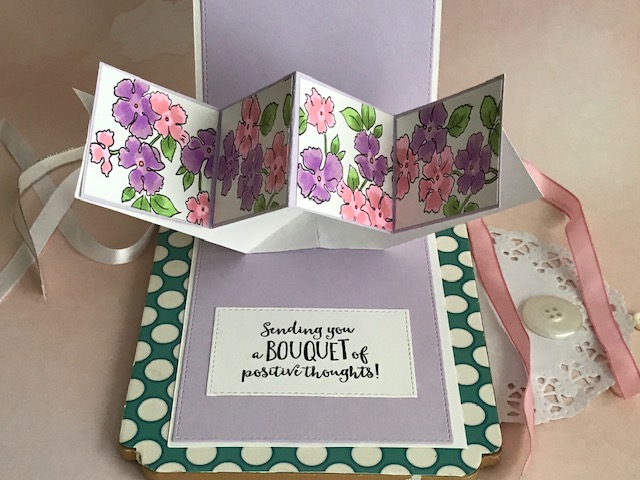
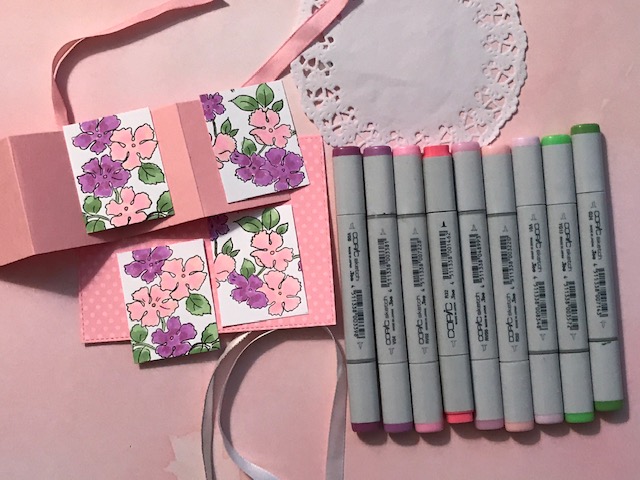
The two cards for the Twist and Fold pop cards included the same twist and fold piece inside. One card used a horizontal A2 card base (the pink one) and the other one was also an A2 card base with a top fold and a vertical layout. I used the same stamped flowers from the Ruffled Flowers set. The images were small that fit in the four panels for the twist piece. I also used a stamped rectangle sentiment for the front of each of the cards and coordinating Copic colors- pinks and purples. I added printed paper inside the pink card and printed paper for the front of the purple card. I cut the stamped pieces to fit on the pink and purple pop up twist piece that was attached to the white twist and scored piece inside the card glued near the card fold. Makes a statement when you open the card.


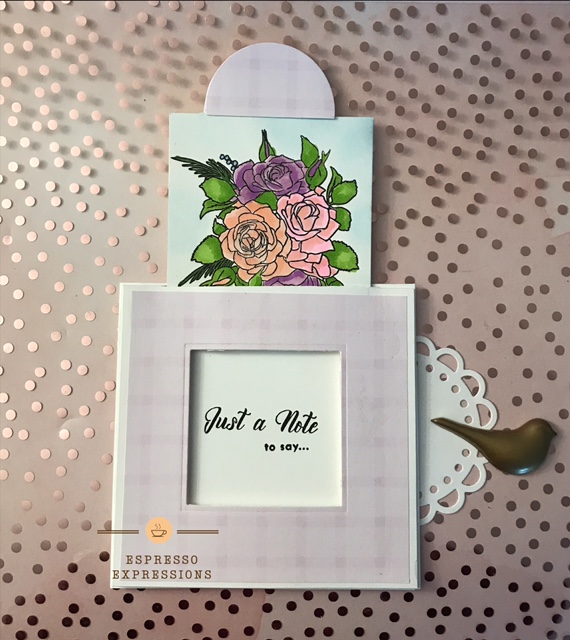
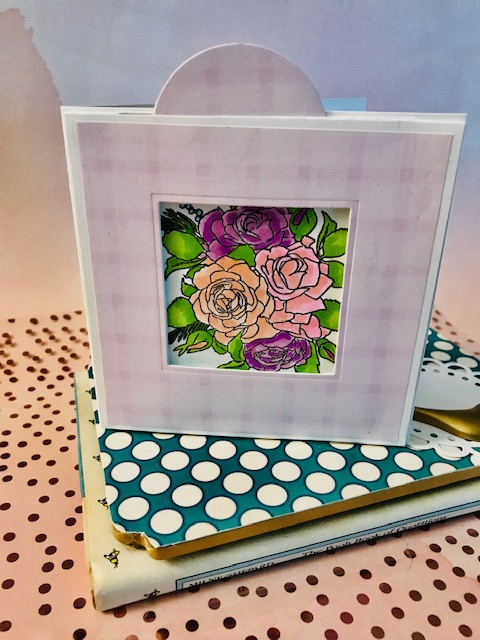
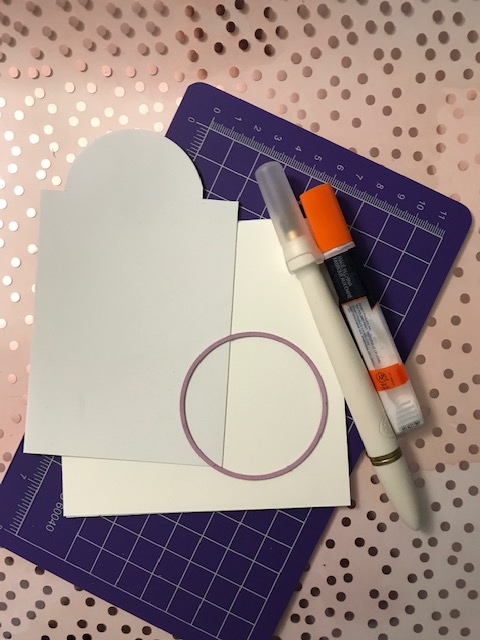
LAST CARD- CREATE MY OWN CARDS IN MOTION CARD
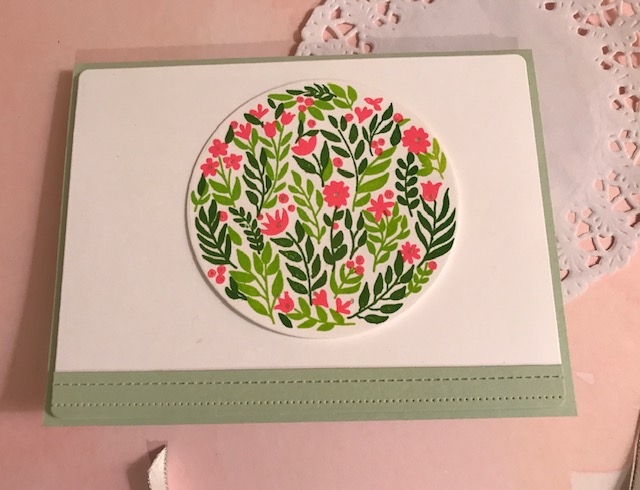
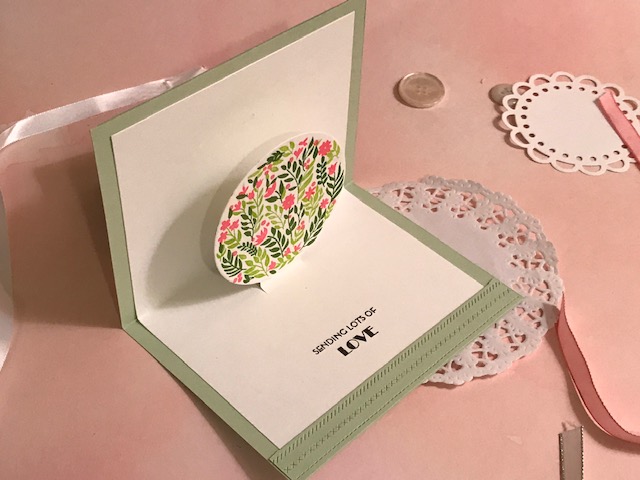
The last technique lesson was to combine interactive ideas and to create my own Cards In Motion card. After reviewing the cards I had completed, I had decided that the inside would have a pop up feature. I recently purchased this new Welcome Home set and coordinating die. So I titled my card creation a Swing Reveal Pop Up card layout. I watched a video by Jennifer McGuire and she demonstrated how to make a swing card that revealed a Just a Note stamped sentiment when you moved the circle that had an invisible swing feature. I gave this layout a try and love the way it came out. The hidden feature was a button and fun foam that made the circle pivot and move . On the inside I created a single pop up feature using the same stamped layered image. I added an embossed green edge on the card front and also on the inside. I added accent dots using a white glittery pen. I love the way this card came out and will make a few more.


WHAT I LEARNED . . .
Taking a risk and experimenting with card layouts that used a technique that focused on moving parts was challenging and rewarding at the conclusion of creating all of the cards. I selected this lesson- Cards In Motion as I wanted to learn new ideas and techniques. There were some I was already familiar with and had used in the past and now fine tuned and some that were very new to me. I like a challenge, they took alot of time, had several do overs and many revisits to the videos for the lessons. I used Altenew stamps, inks, stencils and dies that I had in my collection. The Welcome Home set with the circle was new as I found it in a local stamp store. Lucky find. This is my Level 3 class and I can check it off. Thanks for checking out my post and taking a look at my photos. Happy Stamping
STAMPS AND SUPPLIES
- Altenew Welcome Home stamp set and dies
- Altenew Ruffled Flowers stamp set
- Altenew Forever and Always stamp set and dies
- Altenew Dahlia Blossoms stamp set and dies
- Altenew Smile More stamp set and dies
- Altenew Funky Flowers stamp set
- Altenew Leaf Canopy stamp set
- Altenew Rounded Corner die set
- Altenew Wonky grid stencil
- Altenew ink cubes
OTHER SUPPLIES
- Black and Steel Gray ink My Favorite Things hybrid ink pad
- Versafine black ink
- Archival Leaf green ink and Versasclair lawn grdeen
- My Favorite Things stitched rectangle, banner die cuts and ovals
- Lawn Fawn embossed edge die
- Dies- layered circles
- Prisma colored pencils
- Patterned paper
- White card stock and Neenah white card stock
- Colored card stock
- Sakura black glaze pen
- Sakura gelly roll clear star pen
- Nuvo drops
- White and gold thread
- Sequins
- Clear acetate for shaker cards
- Foam tape, liquid glue, 3M tape runner, fun foam from Michael’s
- ScorPal scoring board
- Fiskars cutting trimmer
- Foam blender handle
- Copic Markers- YG13 chartreuse green, G24 W willow, R20 blush, RV02 sugared almond, RV00 water lily, RV 10 pale pink, V01 heath, R 32 peach, V06 lavendar, V04 lilac, V12 pale lilac, Y04 Acacia, Y13 lemon yellow, Y19 Naples yellow, Y08 acid yellow, Y02 light orange, YR04 chrome orange, G24 willow, B41 powder blue, B32 pale blue, BG45 Nile blue, BG11 moon white, YG17 grass green, V15 mallow, Y19 Napoli yellow, YG06 yellow green, YG 25 celedon green , YG06 yellowish green, E50 egg shell, R20 blush,
