

After completing Level Two lessons and having some time to reflect on the lesson techniques I have added so many new ideas, resources, techniques to my card making skills. I was ready for the final Lesson Two Challenge. Well, here they are!
The Level Two Challenge included designing four different masculine cards and the themes included- Birthday, Love/Thinking of You, Anniversary, and Encouragement.
And the final challenge was Altereing/ Upcycling a piece. After researching/reviewing the lessons, checking my Altenew stamps and resources and my paper crafting supplies I was ready to begin!
First, take a look at my Photo Gallery of the four masculine cards and the Altered/Upcycled project that I designed and completed.
MY PLANNING AND REFLECTION

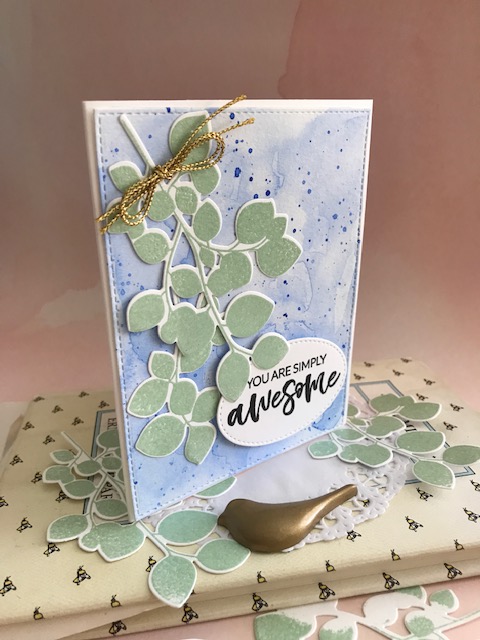
CARD 1- THINKING OF YOU CARD
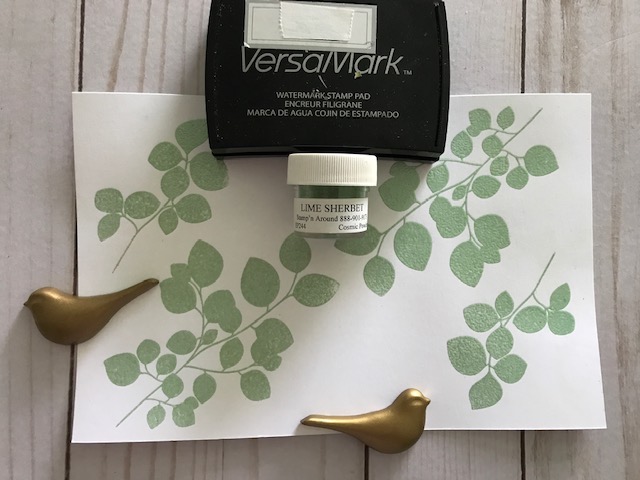
I selected the Altenew Leaf Canopy stamp and coordinating die set. I already had this set in my collection and have used it in many card making projects and it is one of my favorites. I began researching the embossing powders that I had in my collection and ones that would be just right for the leafy branches. One of the Lessons focused on Shine On and was on the search for a shiny look for the leaves.

I tried Peppered Turquoise Opaque, Golden Cadillac, Lime Sherbert, Copper Tex Opaque and Lime Sherbert embossing powders. I selected the Lime Shebert as it had a nice textured green and had a shine when embossed. I stamped the leaves using Versamark embossing ink and heat set the stamped branches with the Lime Sherbert embossing powder.
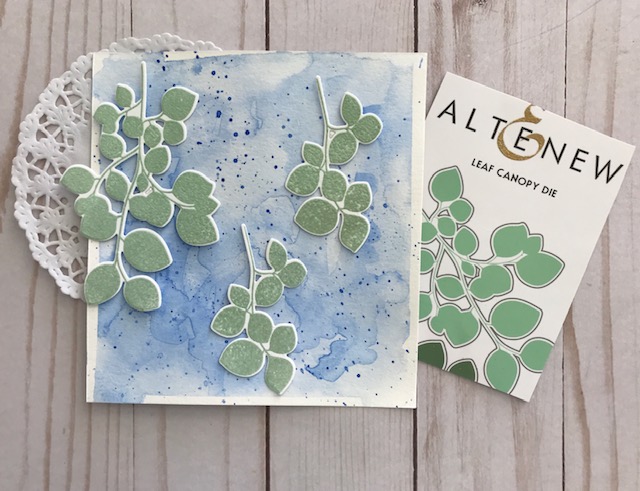
Nex step was to die cut the branches and I selected one large branch and a smaller one to layer them in a group.
After completing that step it was time to create the watercolor painted background. I used Canson watercolor paper and my Kuretake Watercolor set of paints to create a light wash of color to creae the background.
I selected No.64- Blue and No. 61- Light Blue, a wide flat brush to wet the paper and to add the wash of color to the paper. I let the paint drip and move adding more paint and water to cover the entire half sheet. Then I had choices when I cut the paper to a quarter sheet to be die cut. I splattered some paint to create interest, blotted up wet areas to speed up the drying process.
NEXT STEPS
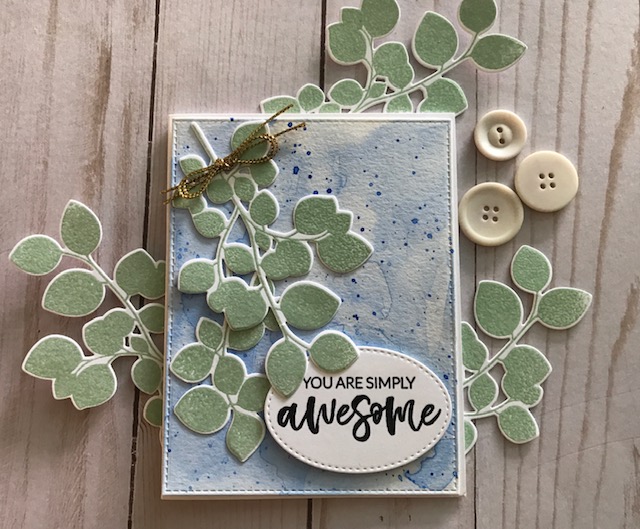
I used a large stitched edge die from My Favorite Things, I die cut the branches and stamped and heat embossed the sentiment- You Are Simply Awesome from the Flourishing Zinnia stamp set. I used black Versaclair ink and heat embossed with clear embossing powder. I die cut the sentiment using a stitched oval die from My Favorite Things. I layered the pieces, glued them into place and added thin gold cording bow from May Arts to the top of the branches. A clean and simple card layout that has visual interest points.
- Altenew Leaf Canopy stamps and dies
- Lime Green embossing powder
- Distress ink for watecoloring
- Canson watercolor paper
- Black Versaclairink
- My Favorite Things stitched dies
CARD 2- ANNIVERSARY YOU MEAN EVERYTHING TO ME

On to Card 2 for the Anniversary card. I used Masking Techniques Unleashed and Scene Building techniques from Lesson 2 classes. When I was planning and researching my supplies for this card, my planning starting with the sentiment You Are Everything To Me. It is part of the Forever and Always Altenew set. I liked that it was appropriate for either the sender or recipient of the card. I love the set Garden Silhouette stamp and coordinating dies. A versatile set I have used for a variety of cards since I purchased it. This card involved a few more steps but I really liked the layered look of the vases which added visual interest.
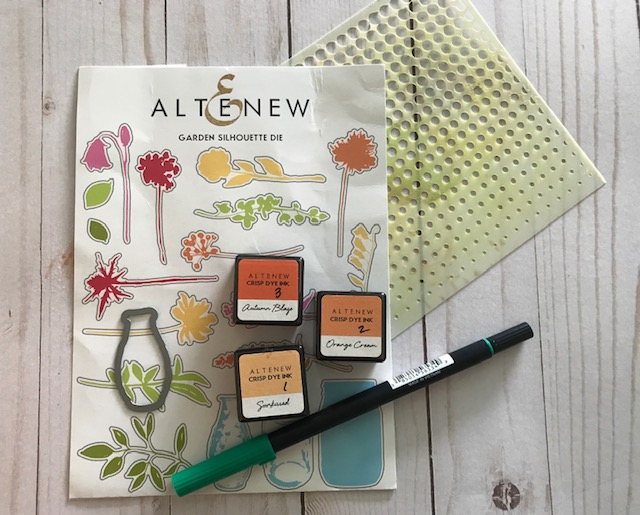
SELECTION OF INK CUBES, STENCIL AND DIE FROM THE SET 
POSITIONING VASES FOR MASKING AND STAMPING
I created the textured vases using an inked paper using light blue distress ink on watercolor paper to create a blended background. When that was dry I sprayed the paper with Tim Holtz distress texture spray. This created a textured and shiny paper backgound. I die cut the vases using the coordinating die and lightly inked the edges with sage green distress ink for shading. Then I could use the placement of the vases to determine where I was going to mask and stamp the flower stems and branches. I die cut the vases from Post It paper squares which I used for the masks when positioning the floral stems.
I colored the stems with a Tombow green brush tip maker and inked the flowers with three shades of orange Altenew ink cubes. I drew a light pencil line for a blue table where the vases would sit. I used a wash of the blue distress ihk to create the table surface and used a wet paint brush to paint in the table line.
I used the graduated Altenew dot stencil to create a light green background on the white card stock using a foam blending handle. I die cut the piece using a stitched edge rectangle die. A piece of melon colored solid paper was slightly larger than the inked piece which added a complimenting color to the layout. Pieces of foam tape was used to adhere the vases to the paper and visual interest. I added black Glaze pen dots to each flower bud and then added clear Nuvo glaze to the flowers when dry. I stamped, stenciled and die cut the word banner and used foam tape to adhere the sentiment strip to the card. My favorite sections are the textured vases and the bright orange flowers. Love this happy card!
I created
- Altenew Garden Silhouette stamps and dies
- Altenew Forever and Always stamp set for sentiment
- Canson water colored paper
- Distress blue ink
- Distress bundled sage ink
- Tim Holtz distress texture spray
- My Favorite Things stitched rectangle dies and banner die
- Tombow brush tip marker
- Altenew orange ink cubes
- Altenew gradient dot stencil
- Black glaze pen
- Nuvo clear liquid for flowers
- 3M foam tape
- Round paint brush
- Post It Notes sticky paper to create the paper masks

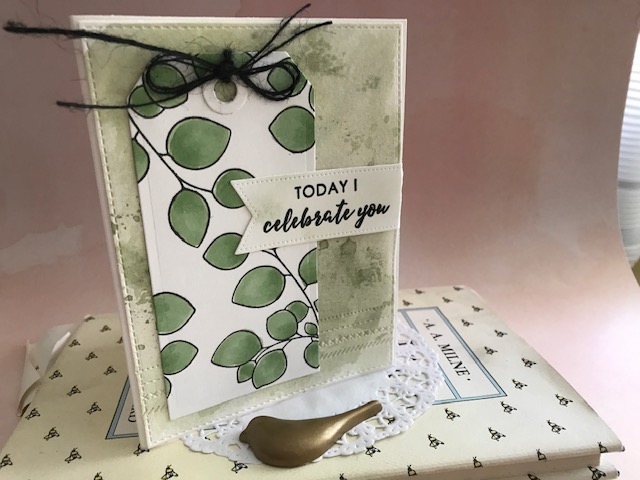
CARD 3- BIRTHDAY “TODAY I CELEBRATE YOU” LEVEL 2 LESSONS- MAGICAL MARKERS AND POLYCHROMATIC TECHNIQUES
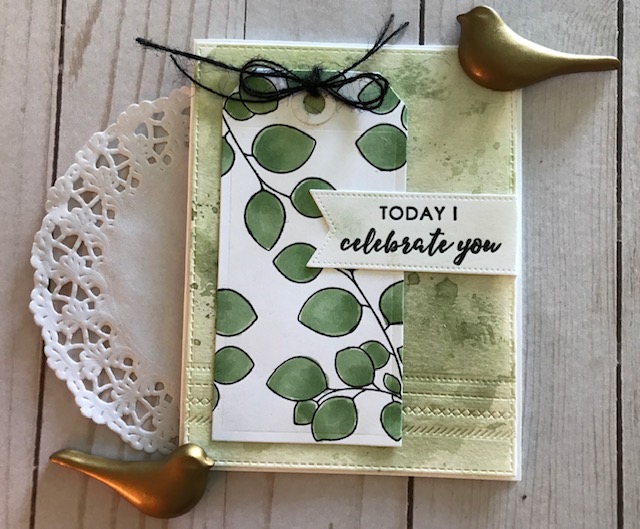
For this guy card the theme was birthday card. I always like to have some guy birthday cards in my ready to mail collection. I went back to the Canopy Leaf set as I wanted to use Copic markers to color and shade the leaves to practice the technique from the Magical Markers lesson. The color theme was shades of green applying the techniques from the Polychromatic color theme. I stamped the leaf branches using black Memento ink and solar white Neenah paper. This is a nice smooth paper which is great for blending alcohol ink markers. I used G21 Lime Green, G24 Willow Green and G21 for blending. When I was finished I used the large tag die from Sizzix to die cut the part of the stamped and color branches. that had the most coverage on the paper. I also die cut the reinforced circle for the tag from the die set as well. That finished the look of the tag. Then it was time to create the painted background. I cut a quarter sheet sized water color paper. I painted the background paper with a wash of Bundled Sage distress ink. I heat set the paint and to speed up the drying time. I used a embossing die from Lawn Fawn . I use this versatile die often as it adds texture and visual interest to a background. I stamped the Altenew sentiment usin black Versclair ink and heat set using clear embossing powder. The banner die is from My Favorite Things, another die that I use alot. I tied a double bow using black twine from May Arts to coordinate with the green and black color theme. The back ground paper was die cut to an A2 size using stitched rectangle die from My Favorite Things. The Lesson 2 was great about using a single color helped me when I was researching and designing this card.


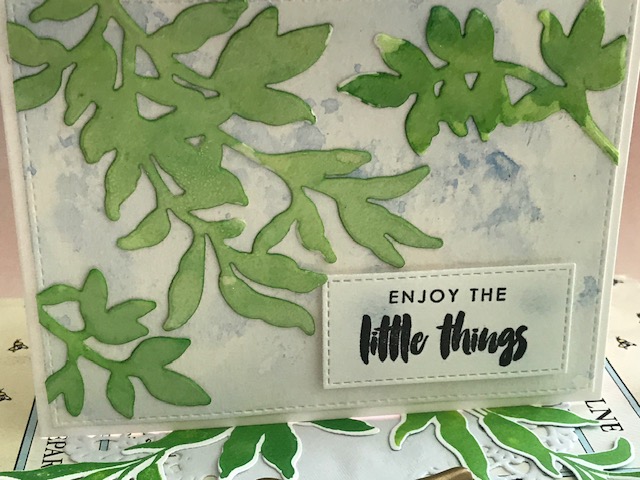
CARD 4- ENCOURAGEMENT “ENJOY THE LITTLE THINGS” CARD

For this last card, I focused on the information from Lesson 2- Easy Die Cutting and Heat Embossing. I used another piece of Canson water color paper painted the paper with a wash of green watercolor from the Kuretake paint box, adding more paint and water to create a shaded painted piece. This painted paper is where I used to die cut the leaf cluster branches. However, my first try was to ink the leaf cluster stamps with two shades of green Altenew ink and die cut them. After that attempt, I decided that there was not enough dimension to the leaves and then tried the watercoloring the back ground instead. The branches had the variety of colors I wanted to achieve.
After the painted paper was dry, I die cut the leaf clusters trying to use as much of the paper for die cutting as I did not know how many I would select to use for the card. The next step was to ink each cluster with Versamark ink and clear embossing powder and heat embossed each cluster I had selected.

Now I was ready to create the card using the painted background paper and the embossed leaf clusters. I die cut the background paper using the stitched edge die from My Favorite Things . I stamped the sentiment “Enjoy The Little Things” from the Altenew Charmed stamp set and was a great match to the theme of the card which was Encouragement. I trimmed the leaf clusters to fit onto the blue paper and added the sentiment. Love the simple card layout and vibrant shades of green.

- Aletenew Leaf Cluster stamps and die
- Altewnew sentiment
- Altenew green ink cubes
- Versamark clear ink
- Versaclair black ink
- Clear embossing powder
- Heat tool
- Sizzix die cutting machine
- Canson water color paper
- Watercolor paints
- My Favorite Things dies
LAST PROJECT- RECYCLED/UPDATE PICTURE FRAME “JUST SMILE”
This picture frame started out as a simple wooden 5 x7 frame from a long ago project that I had covered with several different papers. The challenge was to remove the layers of glued paper to reveal the wooden frame. After sanding and wetting the frame and sanding again, I finallywas back to the original unpainted frame. Then I gave the frame a coat of white acrylic paint to prep for the next step of the upcycled frame.
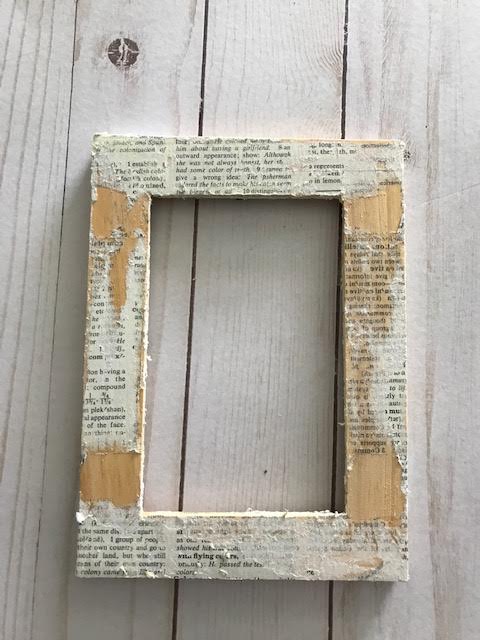


The first step was to remove the paper that was covering the frame, sand it and paint the frame white.
I covered the frame with Altenew wide black and white dot washi tape. I mitered the corners and wrapped the washi tape around the sides and back and the inside of the frame. This covered all of the painted edges. I used a piece of printed paper from a Gelli Plate project and was a bright color and would be a nice contrast to the black and white washi tape,
I stamped the Altenew Halftone smile from a solid piece of painted paper I had and then used the coordinating die. I die cut a rectangle from white paper and stamped the Just above the smile stamped die cut. I added the trimmed background paper to the frame, added the sentiment piece using foam tape to create a raised effect. This simple forgotten frame now had a new bright upgrade!

COVERED FRAME WITH WASHI TAPE AND PIECES TO COMPLETE THE FRAME 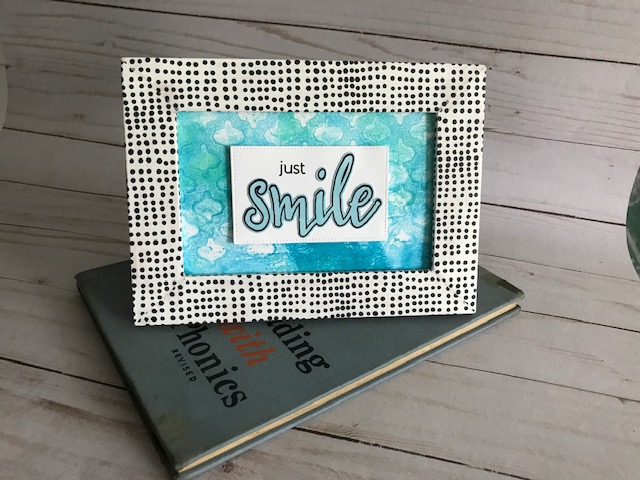
COMPLETED FRAME WITH NEW COLORED INSERT AND RAISED SENTIMENT SMILE PANEL
- Wooden 5×7 picture frame
- Altenew Half tone smile stamp and die
- Altenew Many Dots wide black and white washi tape
- Gelli print painted background
A CRAFTING TOOL TO USE WHEN HEAT EMBOSSING
Using embossing poweder on small die cut pieces be challenging and I found a ‘tool’ that makes it easier. A fellow crafter on Pinterest with a You Tube video on tools that every crafter needs that come from home improvement stores like Home Depot or Harbor Freight. This home crafting tool is a narrow wooden piece that is about 2″ wide and 18″ long or a flat 12″ wooden ruler would work too. The next part is to have a black Teflon oven liner. Cut a piece from the oven liner that will cover the wooden piece/ruler. Use rubber cement to glue the Teflon strip to the wooden piece/ruler. When you have the paper you want to emboss, especially small pieces, spray the Teflon with Pixie spray and secure your paper to the sticky sprayed piece. Stick on your piece, cover with embossing ink and sprinkle on the embossing powder. Heat set, allow to cool and remove the piece. With the melted powder that is left rub it off to clean and empty in the wastepaper basket. Clean off the Pixie spray and its ready for the next time. Easy Peasy!

