
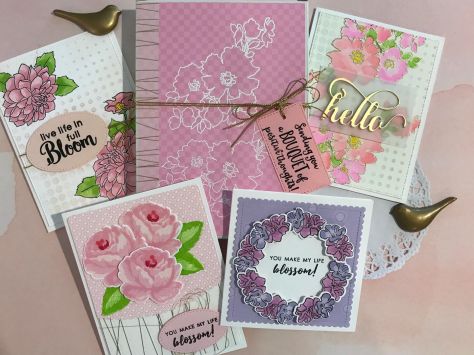
This post is the second half of the end of Level 1 Project Challenge and for this part I focused on designing four cards and a packaging box for the cards. For this part of the challenge, I focused on using coordinating shades of a pink and shades of purple palette for the four cards and gift box. And the theme was flower related sentiments. I used many of the same Altenew stamp sets, inks, dies that I used for the Level 1 homework lessons, including the techniques and tips I learned after completing the lessons. I also created some of my own tips and techniques for the cards and materials that made stamping more user friendly when using the Altenew layering stamp/dies set/ink cubes.
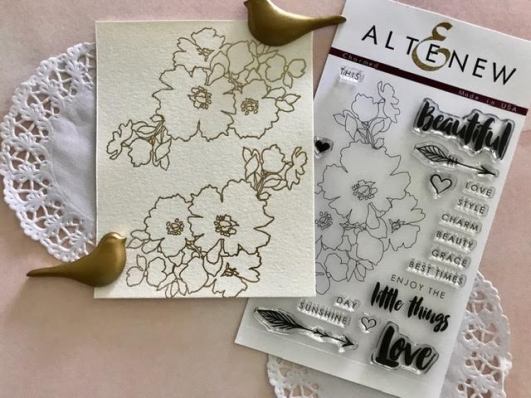
Here are the stamp sets and coordinating Altenew materials I used-
-
Charmed stamp set- abstract flower and sentiments
-
Antique Rose stamp set/stencil/dies- layered roses and leaves
-
Wonderland stamp set/ coordinating dies- poppy like large stamp, stems and buds
-
Dahlia Blossoms stamp set/coordinating dies-layered stamps large and small flowers and coordinating dies
-
Forever and Always stamp set- anniversary set with many sentiments
-
Fancy Hello Die-single hello die
-
Gold Stripe Washi Tape- wide width Washi tape
Tips and Techniques- I numbered the ink cubes covers for the sets I purchased for the classes. This helped me line them up by color gradient first without uncovering them. This simple set eliminated the step of inking paper to determine how light or dark the ink cubes were prior to using. Suggestions- I would include the name or number of the ink sets on the bottom of the ink cube or a sticker on the side to match the ink cube back with the right cover. This simple step helped alot without guessing and selecting the wrong shade of ink I wanted to use.
Helpful Hint- I used the tip of using pencil marks for the layering stamped images. This was helpful as I had not used layered stamps prior to completing the lesson on layering . I also found using my MISTI stamping platform super helpful when using the layering stamps. I could set up each layer of the set, stamp many images then line up the next one in the set, ink and stamp the next layer until the flower was complete. I had more aligned flowers. Hooray! I found this technique when searching on the Altenew page on Pinterest.
Card 1- You Make My Life Blossom/ Technique- Layering Stamping
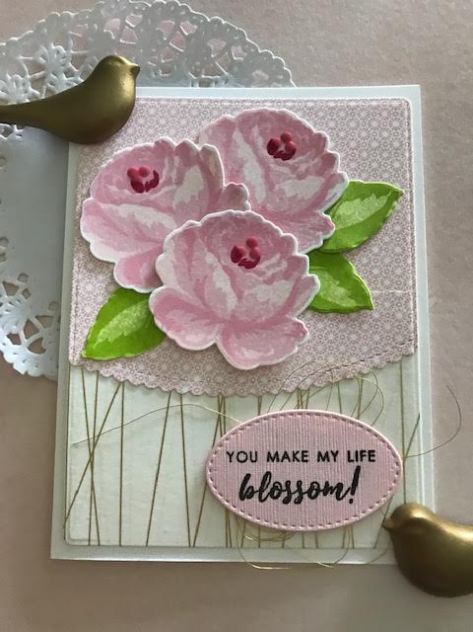
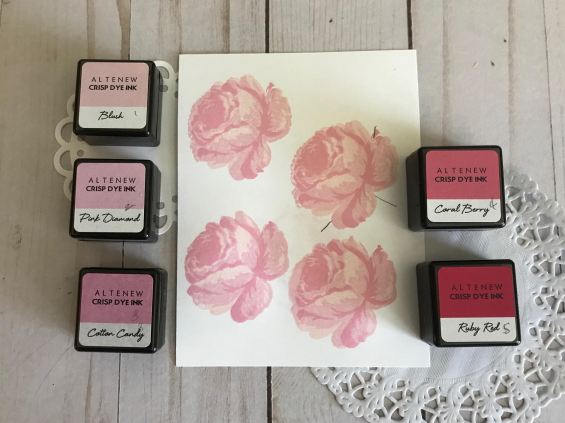
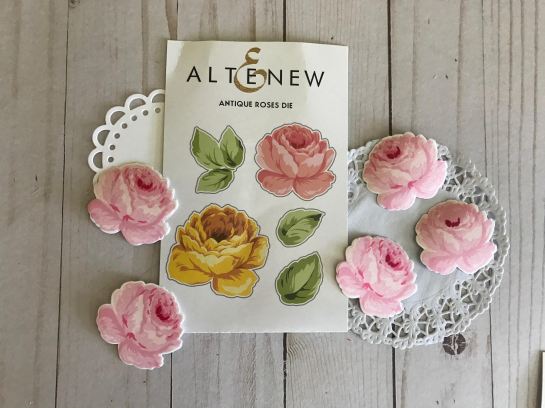
I selected this stamp as my first for my Girl Power card set. Using the layering set and coordinating dies was great practice using the rose layering stamp set. I purchased a set of colored ink cubes to use with layering stamps. I numbered the pink ink cubes to guide my selection of the colored ink I wanted to use for the layered rose image. I also used my MISTI stamp platform to stamp multiplies of each layer which made my layering more accurate. Previous I was tossing alot of my ink layered attempts as they did not line up correctly. I die cut the completed roses and accuracy in die cutting which was important too. I then used a curved scallop edge die cut from My Favorite Things for the printed paper. I then added a piece of white paper for the bottom and covered it with the wide gold stripe Washi tape and adhered it to the back of the scalloped die cut piece. It was ready to attach to the white card stock card base. The You Make My Life Blossom! sentiment was from another Altenew stamp set. I die cut the sentiment using a stitched oval die from My Favorite Things. A bundle of gold thread behind the oval and some foam tape to attach the oval. I layered the three roses and tucked the leaves behind the flowers. I used the focal element of three- 3 flowers and 3 leaves. A few pink glossy Nuvo drops for the center of each flower. The roses came out better with a bit more praetice.
Stamps and Supplies
Stamps- Altenew Antique Rose layering set, Altenew sentiment
Dies- Altenew coordinating dies, My Favorite Things scallop edge and stitched oval die
Inks- Altenew shades of pink ink cubes, VersaFine Onyx black ink, VersaFine Clair Green Oasis ink and Verdant ink
Paper- white card stock , pink pattern paper, pink card stock
Supplies- Altenew washi tape, MISTI stamping platform, Sizzix die cutting maching, Scor Pal scoring tool, gold thread, 3M foam tape, 3M tape runner, Fiskars paper cutter, white glue, Nuvo glossy drops
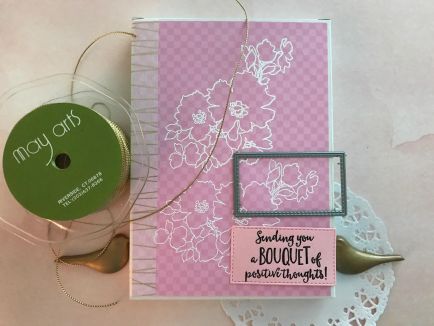
Card 2-Live Life in Full Bloom/Technique- Masking and
Stenciling
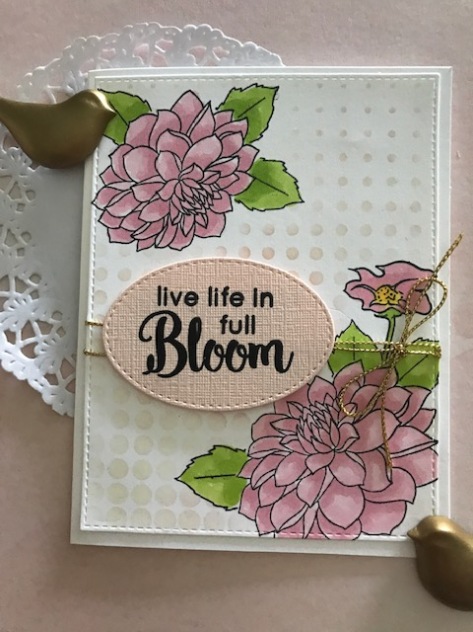
For this card I used the masking technique for the Altenew Dahlia Blossoms stamp set. I stamped the first flower on the Neenah solar white card stock, one in each corner top and bottom. I stamped the same flower on a piece of Post It paper pad sticky edge. For the stamped en covered the flower and stamped three leaves. I then made another paper mask of the leaves and stamped the flower bud. For the bottom flower I also added a flower bud from Wonderland poppy stamp set to add to the elememt of three in the card layout. l liked the big flowers and I used my Copic markers to color and blend the ink for each petal. I use RV11 Pink, RV10 Pale Pink and YG03 Yellow Green. I stenciled the background using the Half tone circle stencil usimg Ranger distress ink Victorian Velvet and a foam pad on a handle to add soft inking. The sentiment was stamped with Versafine Clair Nocturne black ink and embossed with clear embossing powder. The die was a stitched oval from My Favorite Things and so was the stitched rectangle die for the stamped paper. I double wrapped gold cording from May Arts and used foam tape pieces to attached the tag on top of the gold cord.
Stamps and Supplies
Stamps- Altenew Dahlia Blossom set, Altenew Wonderland flow blossom, Altenew sentiment
Ink- Versafine Clair Nocture black ink and VersaFine onyx black ink
Paper- Neenah solar white card stock, pink paper and white card stock card
Supplies- Altenew washi tape, MISTI stamping platform, Sizzix die cutting maching, Scor Pal scoring tool, gold thread, 3M foam tape, 3M tape runner, Fiskars paper cutter, white glue, Nuvo glossy drops
Card 3- You Make My Life Blossom!/Technique- Create a Scene
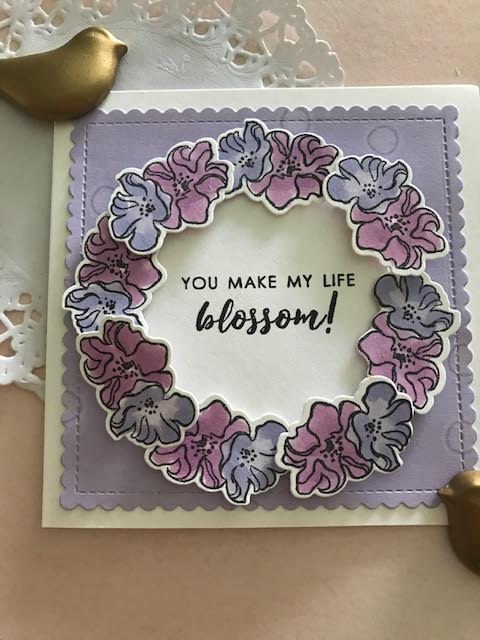
For this card I used only one flower stamp and one sentiment stamp. I created the wreath as my scene. The flower double blossom stamp was from the Wonderland poppy set on Neenah solar white card stock. I stamped double flower eight times using VersaFine black ink. I fussy cut each stamped image. I colored and shaded using Copic markers- BV00 Mauve Shadow, BV31 Pale Lavender and BV01 Viola. I die cut a circle outline using the Essential Circle layered set. I began the wreath starting with the 12:00, then 3:00, 6:00 and 9:00 places using white glue. The remaining pieces I used foam tape. I die cut the purple dot paper using the scallop edge square die.The white card base was trimmed to a square. I die cut a circle and stamped the sentiment in the middle. I layered all of the pieces together to complete the card.
Stamps and Supplies
Stamps- Wonderland poppy set- double flower, Altenew sentiment
Paper- Neenah solar white card stock, purple Lasting Impression
Stencil- Altenew Half tone stencil
Supplies- MISTI stamping platform, Sizzix die cutting maching, Scor Pal scoring tool, 3M foam tape, 3M tape runner, Fiskars paper cutter, white glue, Essential Circles by Heather, VersaFine black ink
Card 4- Hello!/ Technique- Let It Shine!
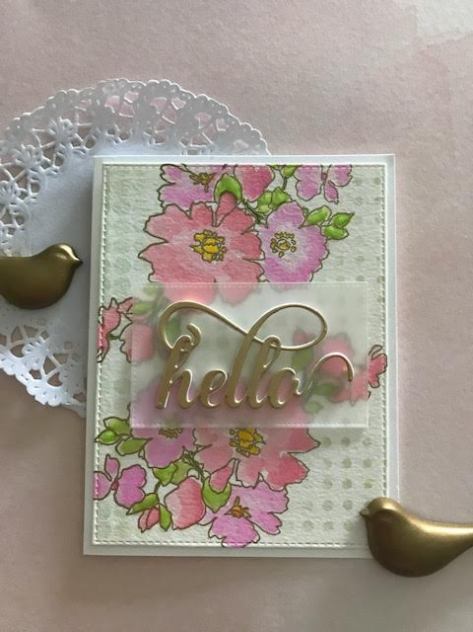
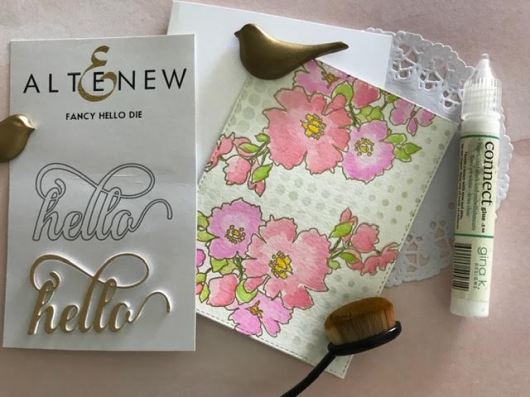
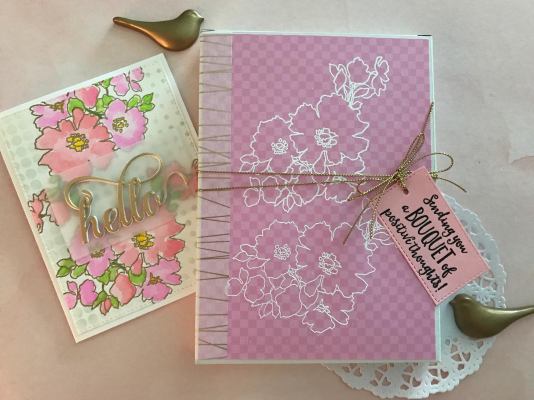
This card was all about the shine. I stamped the flower image from the Charmed stamp set. twice with a small space in the middle. I used VersaMark watermark ink, static powder pouch to stamp the images on to watercolor paper. I used the MISTI stamping platform to get a good stamped image on to the watercolor paper. I colored/painted the flowers and leaves using Zig markers light green, light carmine, pink and yellow and painted and blended using a water barrel brush. I die cut the Fancy Hello die from gold metallic paper and twice from white paper. I layered the die cut paper gluing the gold paper on the top. I used the dot stencil and light green distress ink and foam pad and handle. I die cut a stitched rectangle from vellum paper. I assembled the card. I added tiny glue spots to the back of the word die to hide the glue.
Stamps and Supplies
Stamps- Altenew Charmed set
Dies- Altenew Fancy hello die, My Favorite Things stitched rectangle dies
Paper- card stock, water color paperk vellum, gold metallic paper
Inks-VersaMark water mark ink and Zig markers
Emossing Powder- Stampendous gold detail
Supplies- MISTI stamping platform, Sizzix die cutting maching, Scor Pal scoring tool, 3M foam tape, 3M tape runner, Fiskars paper cutter, white glue
Gift Box for Cards
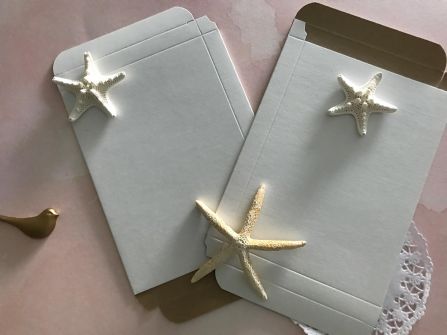
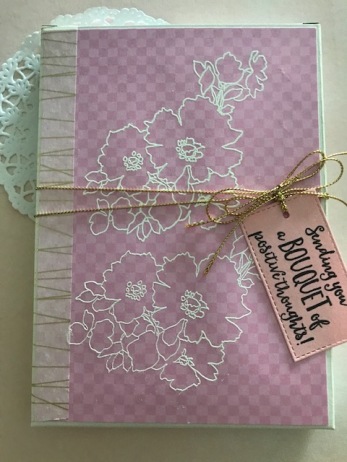
I repurposed a flat cardboard gift box left over from a long ago holiday gift project. I cut thecchecker paper to fit the front of the box. I then stamped the same flower branch twice on the pattern paper using Versamark ink and white embossing powder.Then glued it to the front of the box. I then added the wide washi tape to the left side of the front of the box and wrapped it around the side of the box. I stamped a tag using another Altenew sentiment to pink paper and die cut that as well . I used gold twine from May Arts, wrapped twice around the box. I punched a hole in the tag and tied it with gold cording to the gold twine that was wrapped around the box. A perfect card set for a Girl Power gift.

Congratulations on completing your level 1 project. The cards are beautiful and i can see how much hard work you have put in 🙂
Thanks. I could only post a few cards to the Gallery 17 as I created two separate blogs and additional posts can’t share the same hyperlink. Check out the blog posts for the rest of the projects. Thanks so much!!!
Beautiful Level 1 Project! Lots of love went into those cards. 🙂
Thanks I wanted to do a color theme and bloom sentiments. Thanks again!
Congratulations on completing Level 1… your cards are beautiful!
Thanks so much!!!
Wow Nancy! These look so pretty! I kept thinking of Mother’s Day because they are so soft and feminine looking. Nice job at explaining the process and details.
Thank you for entering your work to the AECP assignment gallery. Well done!
Thanks so much!!!