
WHAT I LEARNED . . .
After reading and watching all the lessons my big take away learning how to create backgrounds for cards that were using different techniques for coloring, painting, blending and stamping. I was able to repurpose the Altenew stamps, stencils and dies that I had to create cards based on the lessons and video techniques. As you read the blog post, you will recognize some of the stamps and resources from other blog posts. Being creative and learning how to repurpose my supplies was a great take away for me.


CARD 1- CREATING A BACKGROUND FOR A PATTERNED EFFECT

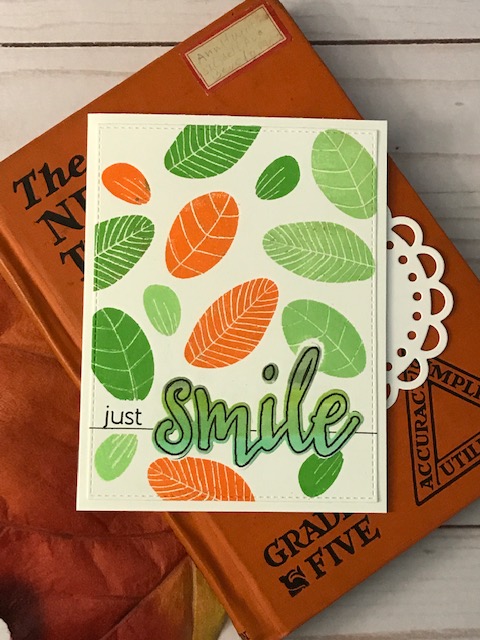
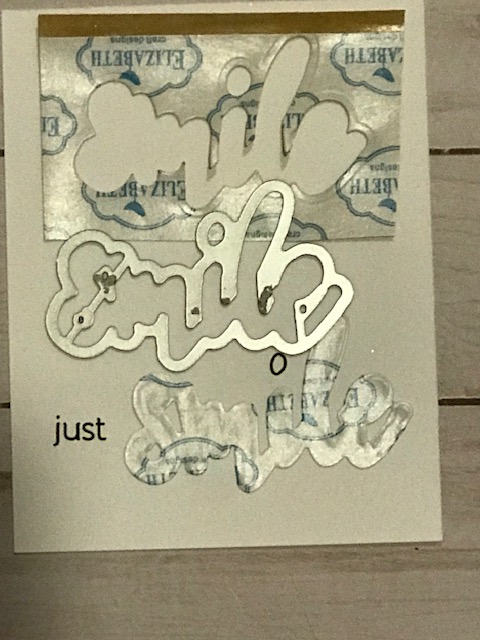
I selected the Funky Flowers set from Altenew to create the background. I stamped the outline smile at the bottom of the paper to plan the layout of the card. Then used the MISTI stamping platform to stamp the word ‘just’. The next step was to stamp a mask and die cut it to cover the stamped word. Then I was ready to use the Altenew ink cubes in shades of orange and green to create the background on the quarter sheet of card stock. I stamped the smile outlne stamp on white cardstock and used Copic markers to create a gradient colored image. I die cut it and layered it over the original stamped image. I used my T square ruler to draw a fine black line across the bottom of the paper. I die cut the piece using a stitched edge rectange die from My Favorite Things. The last step was to outline the veins on the leaves with a sparkly glaze pen to add some shimmer.

CARD 2- USING A MASKED SECTION AS PART OF A BACKGROUND

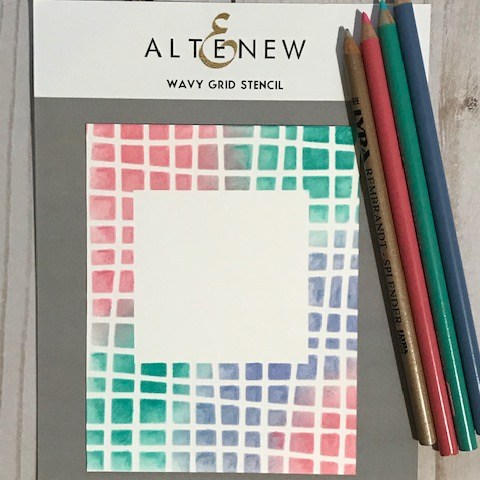
This card lesson used a masked section for a focal point on the card front. I die cut a piece of masking paper using a rectangle die and placed it in the middle of the white card stock. I did not have a large background stamp to use so I used the Wavy Grid stencil from Altenew to create a background. I used several shades of Oxide inks and a foam blending tool to apply the ink and overlap the colors. I then used coordinating Prisma colored pencils to add shading to each inked block to create visual interest. I removed the mask and used the MISTI stamping platform to stamp ‘sending you a ‘ in the square that was masked, I stamped and die cut the smile word. I used the stitched edge rectangle die from My Favorite Things for the card front. I completed the card by attaching it to a A2 white card base. I used small pieces of foam tape to add dimension to the die cut smile and added it to the square to complete the card.


CARD 3- CREATING A COLORED BACKGROUND
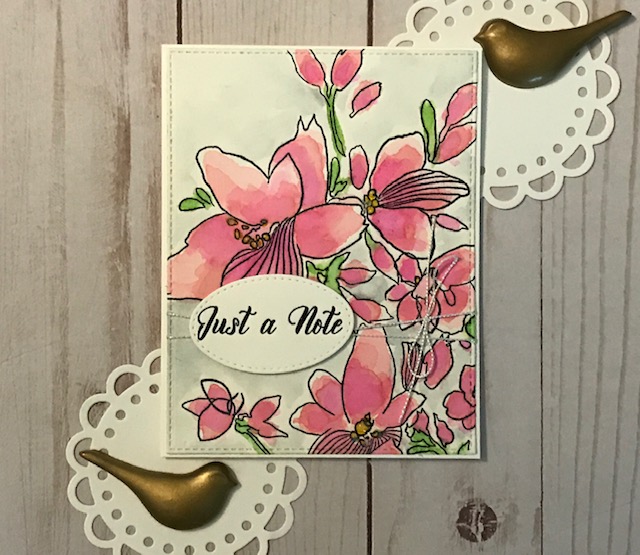
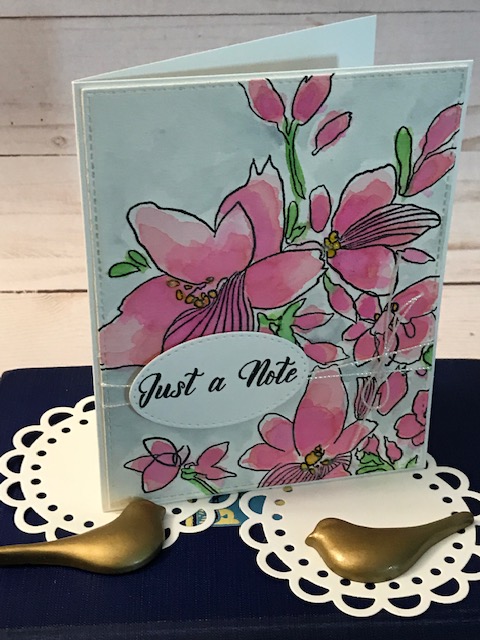
For this card technique I stamped the large flower stamp from the Altenew Sketchy Floral set. I used permanent black ink and stamped the large flower image on watercolor paper. I painted the background using oxide ink weathered wood blue ink. Then I used oxide ink in worn lipstick/pink and cracked pistachio/ green to paint the flowers and leaves using a water barrel paint brush. When that was dry, I used the fine tip Zig markers to add another layer of shading to the flowers, leaves and yellow to the center of the flowers. When dry, I used My Favorite Things stitched rectangle edge die to trim the paper. I used a sentiment from another Altenew stamp set using Versaclair black ink and heat embossed using clear embossing powder the sentiment. The oval stitched die is from My Favorite Things . I added white twine from May Arts around the front painted piece and added the oval using foam tape for dimension. I added the piece to a A2 white card base. The last piece was to add glossy clear accents from Nuvo to the center of each flower. I like the soft blended colors using this technique.


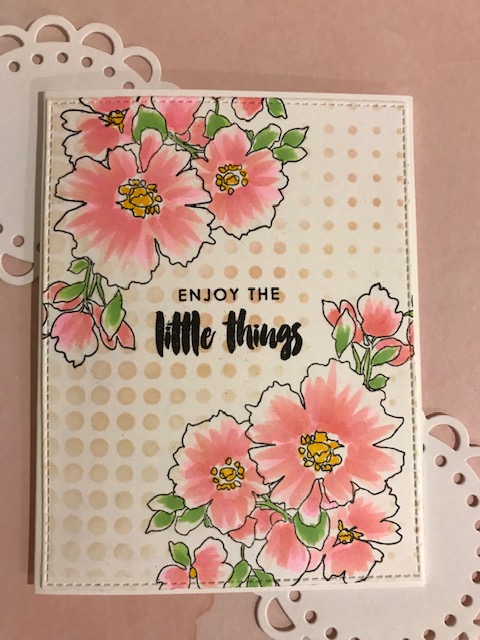
CARD 4- ADDING AND BLENDING COLORS

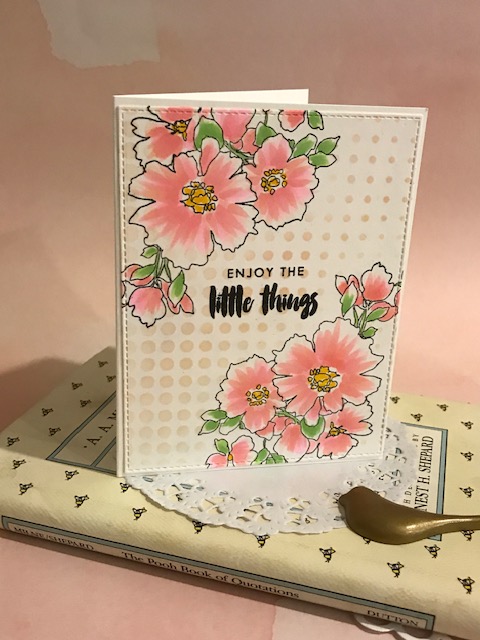
This lesson focused on layering colors using markers and masking techhiques. After watching the video- several times, I selected an Altenew floral stamp that did not require any maskinfg but had many flowers to practice the coloring techniques using Copic markers. The lesson also focused on using alcohol markers to color, shading and blending to create a background for the stamped image. I modified the background to use a dot stencil from Altenew instead. After several attemps to use Copic markers to add a background color, I switched to using the inked stencil. That gave a must softer look that matched the colored flowers. I liked the new technique of layering the inked strokes to fan out from the center of the flower which created a softer colored flower that radiated from the center, buds and leaves. To continue the one layer concept, I used the MISTI stamping platform to position the sentiment- Enjoy The Little Things. I stamped the flowers using black hybrid ink from My Favorite Things for as I using alcohol inks and Versafine black ink for the sentiment. The final touches were adding white gel pen dots to the flowers and clear Nuvo drops to the flower centers. I die cut the piece using a stitched edge rectangle die from My Favorite Things on to a A2 white card base. Love the soft pink colors.


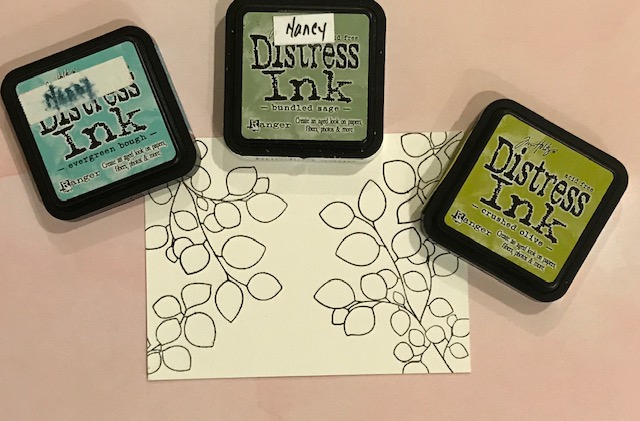
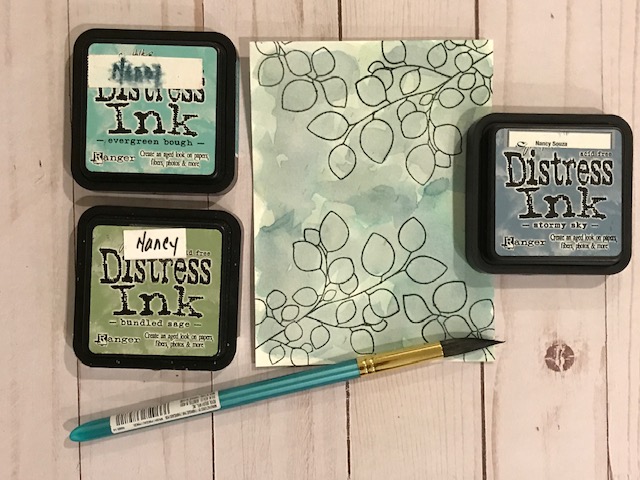
CARD 5- CREATING A BACKGROUND AND SHADING USING DIFFERENT COLORING TOOLS

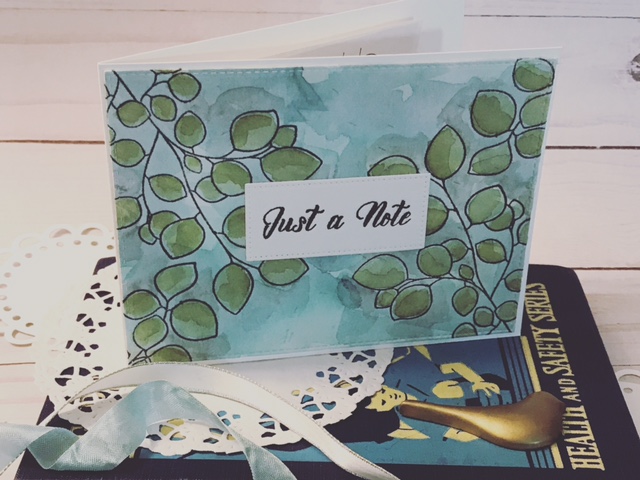
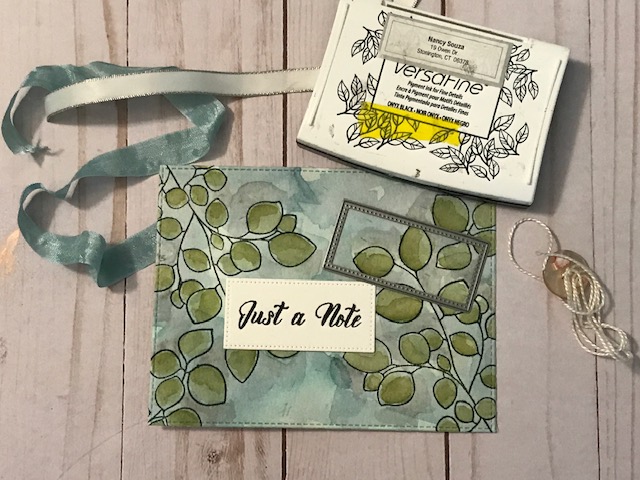
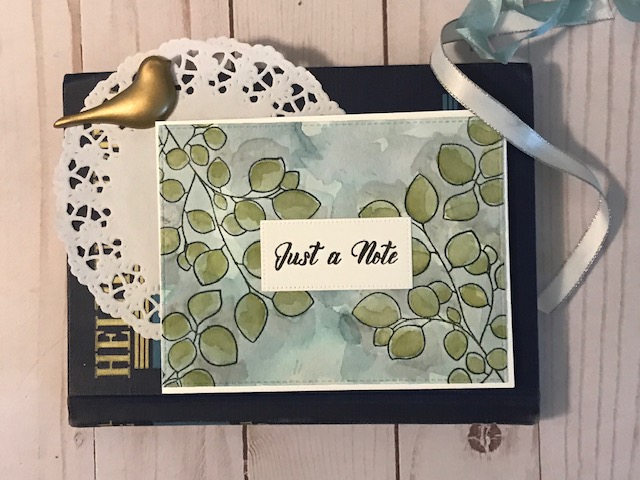
This objective for this card was adding shading for dimension. For this card I used watercolor paper and the Altenew Leaf Canopy stamp. I stamped the branches to cover as much of the paper as I could. I used a smaller stamp to fill in the space in the bottom left corner. I painted the leaves using a wash of distress inks- stormy sky, evergreen bough, bundled sage and a wash of blue and gray for the background. When that was dry I used Zig markers- olive green and gray brown to shade the leaves and add depth behind the leaves. I decided to stamp the sentiment- Just A Note- on a separate tag to avoid any stamping problems. I die cut the piece using a stitched edge rectangle. I also used a larger stitched edge die for the larger stamped and painted piece, I added them to a A2 left fold white card stock. I really like this shading technique as it looks more like a painting than just a card front.

LAST CARD IN THE CLASS- SHADING USING TONES OF GRAY

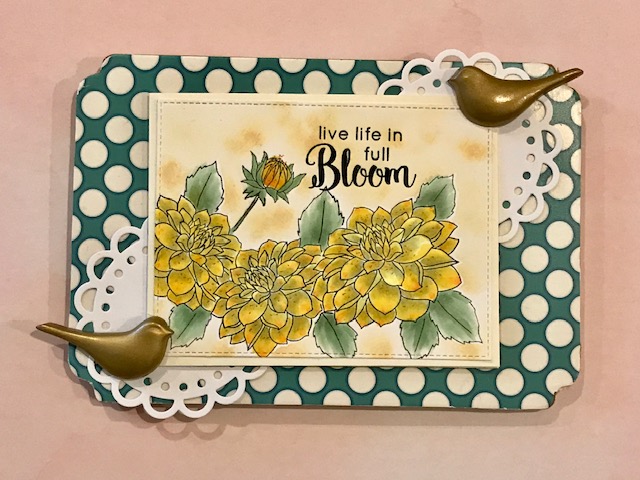
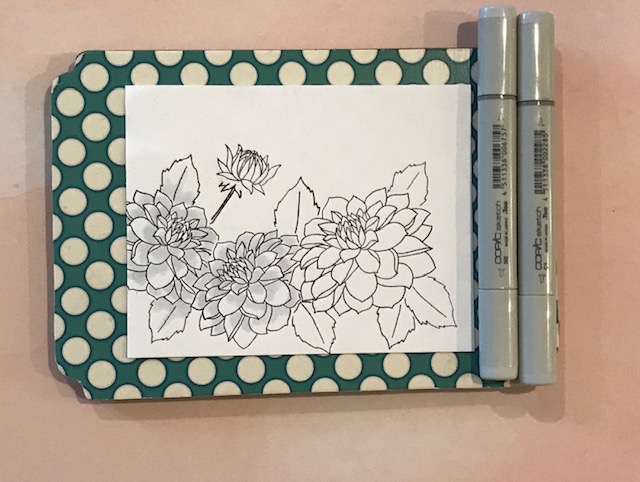
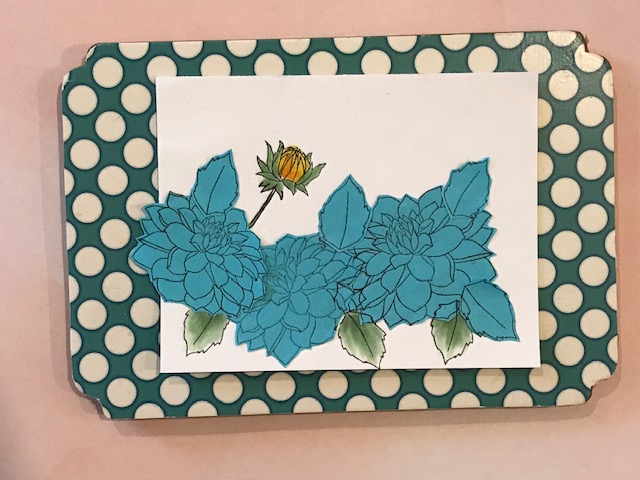
One more lesson and this lesson objective started with the shading first. I stamped Post It paper to cut and create masks for the large dahlia, small dahlia and leaves. I stamped the largest dahlia flower first, covered it with the paper mask, stamped the smaller dahlia twice, left the masks in place to stamp the leaves and the single flower bug. Then I began the first layer of adding the lightest color of gray Copic marker. The lesson also focused on the importance of adding the shading to areas of the flower petals that curled and the leaves under the petals as well. The next step, was to add another slightly darker shade of gray. I did this for several other shades of gray slightly darker Copic marker each time. The last step was to add color in shades of yellow, going from lightest to darkest using Copic yellows. This step allowed the yellow layer to accent the shaded petals tone down the yellow. I did the same steps for adding color to the leaves. The background was colored with a small blending brush with light yellow ink. I stamped the sentiment with black ink and added distress oxide ink in antique linen using a blender brush. I added some pen glaze orange dots using a Kaiser Craft pen to the petals for accents. Almost done, then I used a stitched edge rectangle die for this piece and added it to the A2 white card stock base. Done!


SUPPLIES AND MATERIALS
Altenew stamps/die – Charmed stamp set, Leaf Canopy set, Sketchy flower stamp set, halftone Smile and die, Funky Flowers
Altenew inks– Blush ink cube
Altenew stencils– halftone dot , wavy grid
Dies– My Favorite Things stitched edge rectangle dies and oval stitched die
Inks- Ranger distress inks- Stormy Sky, Evergreen Bough, Bundled Sage, My Favorite Things black hybrid ink, Versafine black ink, Versafine Clair Nocturne Ink Ranger Distress Oxide Worn Lipstick, Oxide Cracked Pistachio, Weathered Wood blue, Distress Oxide Antiqiue Linen
Markers- Copic markers YG 05 Salad Green, YG13 Chartruese, Y19 Napoli Yellow, R20 Blush, R21 Light Pink, R32 Peach, RV 02 Sugared, YG25 Celadon Green, YG41 Pale Cobalt Green, YG63 Pea Green, YG23 New LeafAlmond Pink, N00 Neutral Gray, N2 Neutral Gray No.2, C1 Cool Gray, Y15 Cadmium Yellow, Y02 Canary Yellow, Y15 Cadmium Yellow, YR02 Light Orange, Y11 Pale Yellow, Y02 Canary Yellow, G24 Willow Green, G21 Lime Green, Zig Marker- Olive Green, Gray Brown
Paper– watercolor paper, white card stock

All your cards are gorgeous, Nancy. I like how well you explained all the steps and a couple of process photos. Just keep an eye on that masking a bit, like on the smile card. Always cut your mask from inside the outline instead of the outside. In this way, when you will stamp, it would not leave the white portion between the sentiment and leaf. And never use a die-cut as a mask unless you pay absolute attention, slightly use it as an offset. This is very tricky, this is why it is always advised to cut a mask. Also, if you are not using masking paper, use a copy paper but never a cardstock as it’s too thick. Masking is a difficult area to master, this is why we included it as a full course 🙂
I will also point out one more thing, in the one-layer wonder class, you are supposed to do everything on that one layer, even stamp the sentiment. This is just for future reference. You could mask off that area and stamp the sentiment (as you did the area on the stenciled card) once your card is complete if you want a white area to stamp on etc.
I know you wanted to step-up your cards by adding die-cut sentiments and tags, but the One-Layer Wonder Class shows us that you can do everything on one layer, even create faux dimensions on that one layer.
Thank you for submitting your beautiful work to the AECP assignment gallery. I hope my tips will be helpful in the future (in your workshops).
Very pretty set of cards!
Thanks Karen. Thanks for stopping by!