ALTENEW FABULOUS FLORA BLOG HOP AND GIVE AWAY
This newest Altenew release set includes an awesome variety that includes 3 D embossing folders, layering stencils and coordinating dies. Everything in the set is awesome and different and could not wait to start planning and creating cards. Here are the cards I created using the materials from this set. There are more choices to select from and these are the ones I selected to work with. Your turn to be inspired!
ALTENEW FABULOUS FLORA CARD SAMPLES

DETAILS ON HOW I CREATED EACH CARD
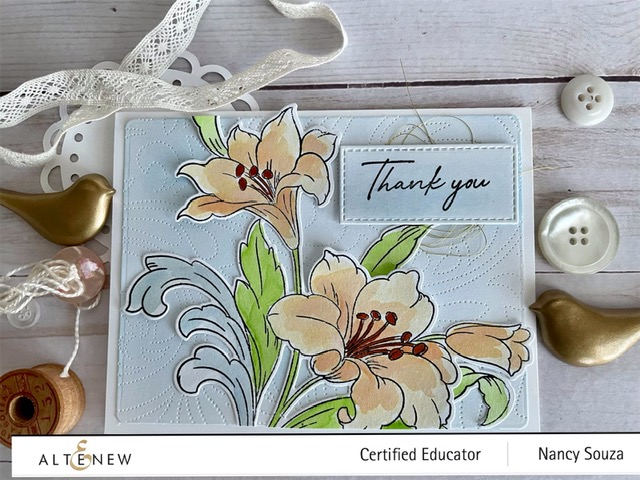
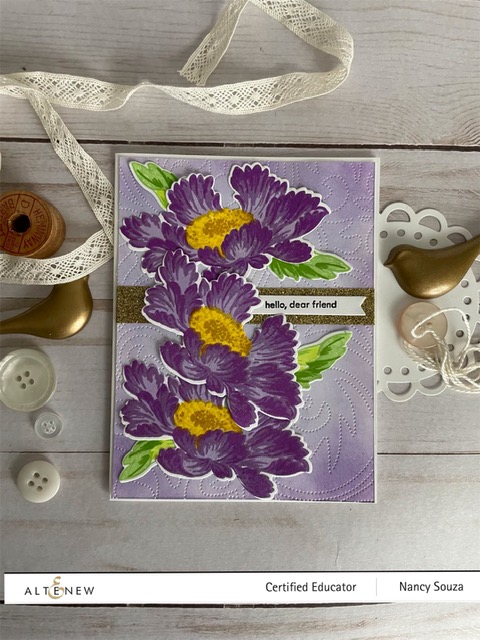
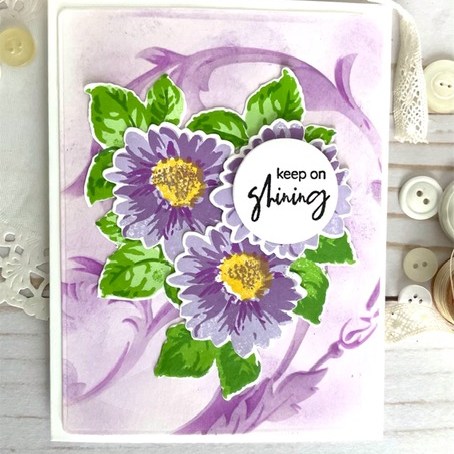
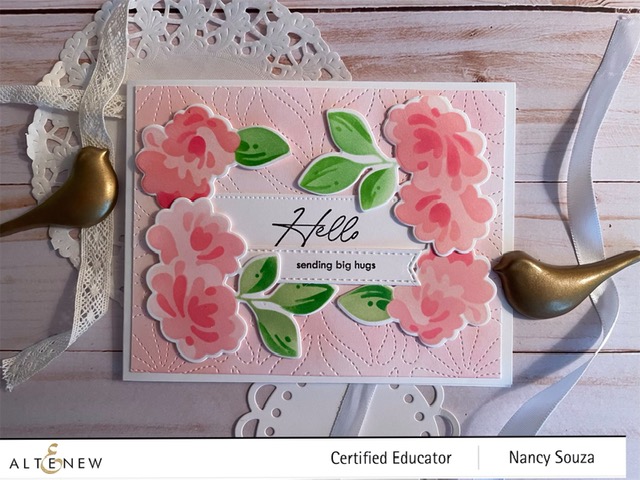
For the first card, I used the Altenew Blobby Rose layering stencil to ink each of the layers of the roses and leaves using Altenew ink cubes in shades of pink and green. I stenciled the roses/leaves on two half sheets of white card stock. This second stenciled paper was needed to die cut enough flowers- single and double and extra leaves. The finished card had two double roses, two single roses, and extra leaves. I used Altenew’s Dotted Swiss debossing plate on white card stock and lightly blended and inked Altenew light pink background. The stamped sentiment tags were from the Altenew Craft-Your-Life project kit Feathered Lilies. I tucked the tags behind the flowers. Change the colors and you have a different look. The layered stencil is awesome, too.
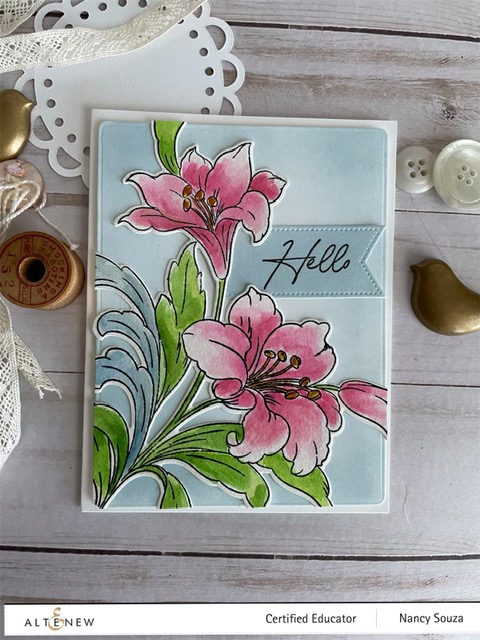
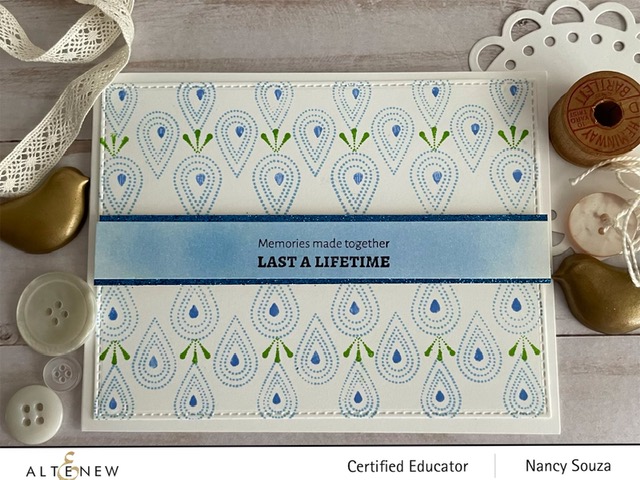
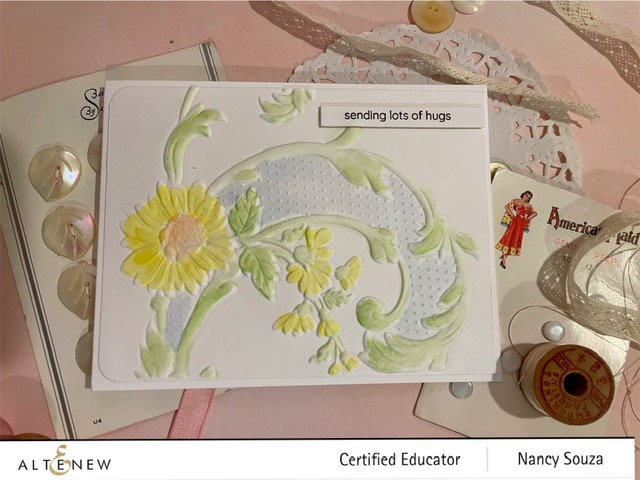
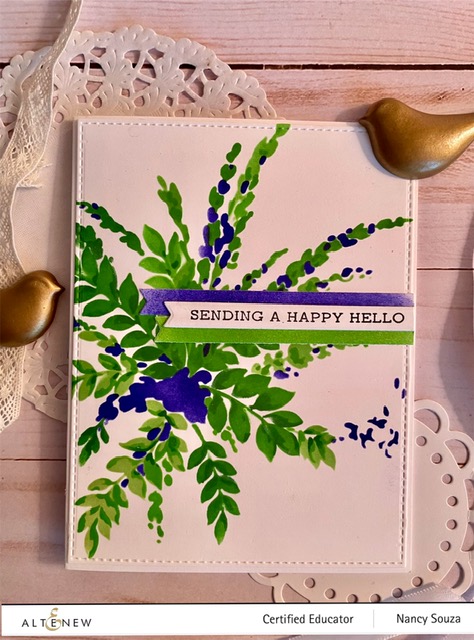
For the second card, I used Altenew’s 6 x 6 five layering stencil Meadow Burst on a half sheet of white card stock as this was a large stencil. I used Altenew mini ink cubes- shades of green and dark blue as the accent color. I also used the same ink colors to create two accent narrow banners for the stamped word banner. I trimmed and die cut the stenciled piece for an A2 card and added the three mini banners. Change up the ink colors and you have a totally different card.
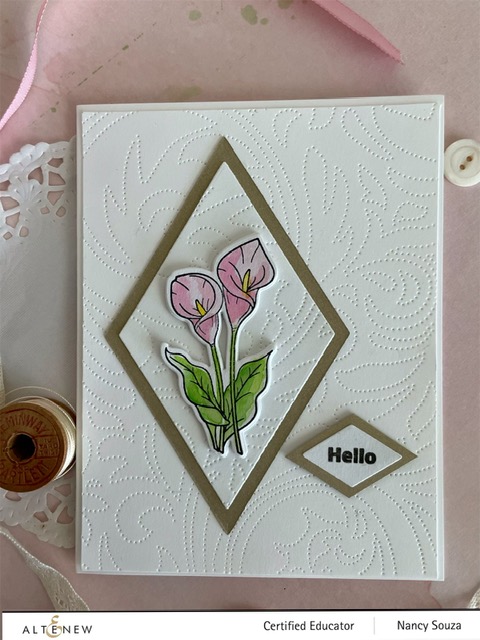
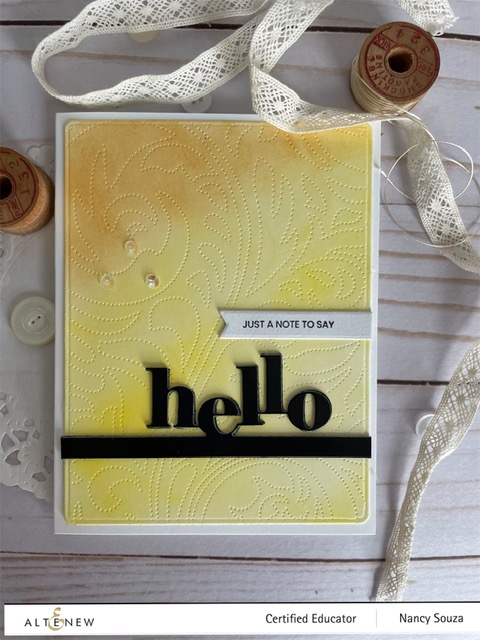
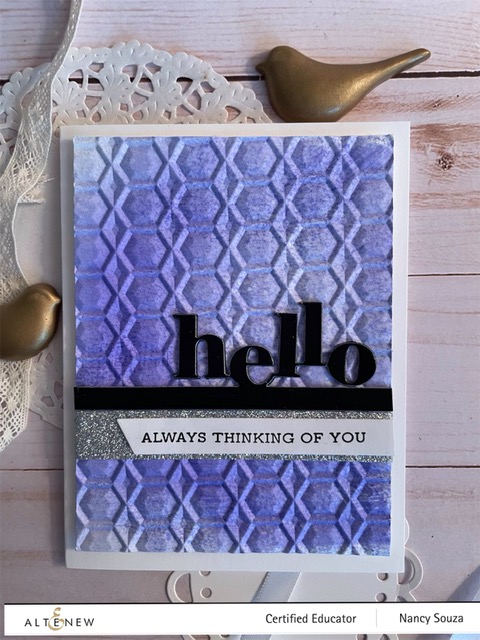
For the third card, I used the Altenew’s 3D Gems embossing folder and heavy weight watercolor paper. This type of embossing folder creates a deep impression and heavy weight paper works well. First, I inked my glass work mat using Altenew dark blue ink cube and sprayed it with water and dragged the paper through the ink puddle. I continued to add ink to cover the quarter sheet of paper. I dried the paper using a heat tool and set it aside. I die cut the Hello from glossy black paper for the top layer and cut another from regular black paper for added dimension and glued them together, I stamped a mini word banner and trimmed it. I used Altenew’s silver glitter washi tape as an accent. I trimmed the embossed and inked paper so there was a white edge for the card front. The Hello word die and sentiment were from Altenew’s Hello and word set.
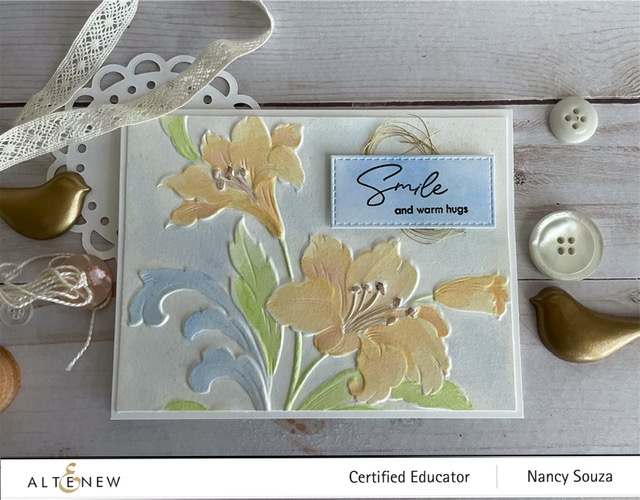
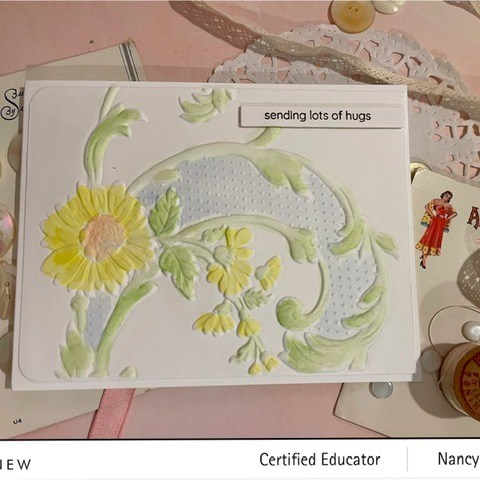
And for card number four, I used heavy weight white card stock to use with this new Altenew 3D Curving Leaves embossing folder. This time I masked off the edges of the quarter sheet of card stock to create a rectangle in the middle of the paper. I used an Altenew green ink cube and inked the rectangle space. The next step I embossed the piece and then trimmed it to fit on the card front. I die cut the Hello again this time using gold glitter paper and trimmed the die to fit on the front of the inked space. and I also die cut anothrer hello and layered it behind the gold glitter piece for added dimension. Creating the accent colored space show cases the embossed paper both inked and left white. Easy option to try.
Giveaway Prizes
There are $300 in total prizes! To celebrate this release, Altenew is giving away a $50 gift certificate to two lucky winners and a $25 gift certificate to eight winners! Please leave a comment on the Altenew Card Blog and/or each designer’s blog post on the Blog Hop list below by 01/27/2022 for a chance to win.
Altenew will draw ten random winners from the comments left on each stop of this blog hop and announce the winners on the Altenew Winners Page on 02/01/2022.
ALTENEW SUPPLIES AND RESOURCES
- Altenew Meadow Burst 6 x 6 layering stencil
- Altenew Gems Geometric 3D Embossing Folder
- Altenew Curving Leaves Botanical 3D Embossing Folder
- Altenew Blobby Rose Layering Stencil
- Altenew Blobby Rose Die Set
- Altenew Dotted Debossing cover plate
- Altenew ink cubes- pinks, greens, blues
- Altenew Hello die
- Altenew Craft Your Life Feathered Lilies sentiment set
- Altenew gold glitter washi tape
- My Favorite Things stitched edge banner dies and rectangle die
- Gold glitter paper
- Black glossy paper
- Black ink
- White card stock
- Ranger ink blending foam
- Post It wide paper tape for masking
BLOG HOP ORDER
Nancy Souza– YOU ARE HERE